Our January release focuses on entering good data in the system. This release is expected to go live on 1/14/2024 at 11 PM EST (Click here to see the time in your timezone).
Audit Checklist 2.0
Good reporting starts with good data entry. To that end, we have rewritten the audit checklist to allow more fine-grained control around the types of data you want to collect.
The Audit Checklist has a new location
You will now find the Audit Checklist in the client menu instead of under facility.

Adding form items that must be completed
In Audit Checklist 2.0, there are two types of completion steps. The first type is called “required to complete”. These items are marked with a blue asterisk. Although you can save forms without filling out the required to-complete fields, they won’t be marked as complete in the audit checklist until you add the information.
The second type is called “Required to close”. Any field marked as required to close will prevent a standard user from closing out a client until the information is provided. However, in case the information cannot be obtained, a supervisor can override the close check.
To require a field to be filled to be considered complete or before client close, open the administration menu and select the Form Admin menu item
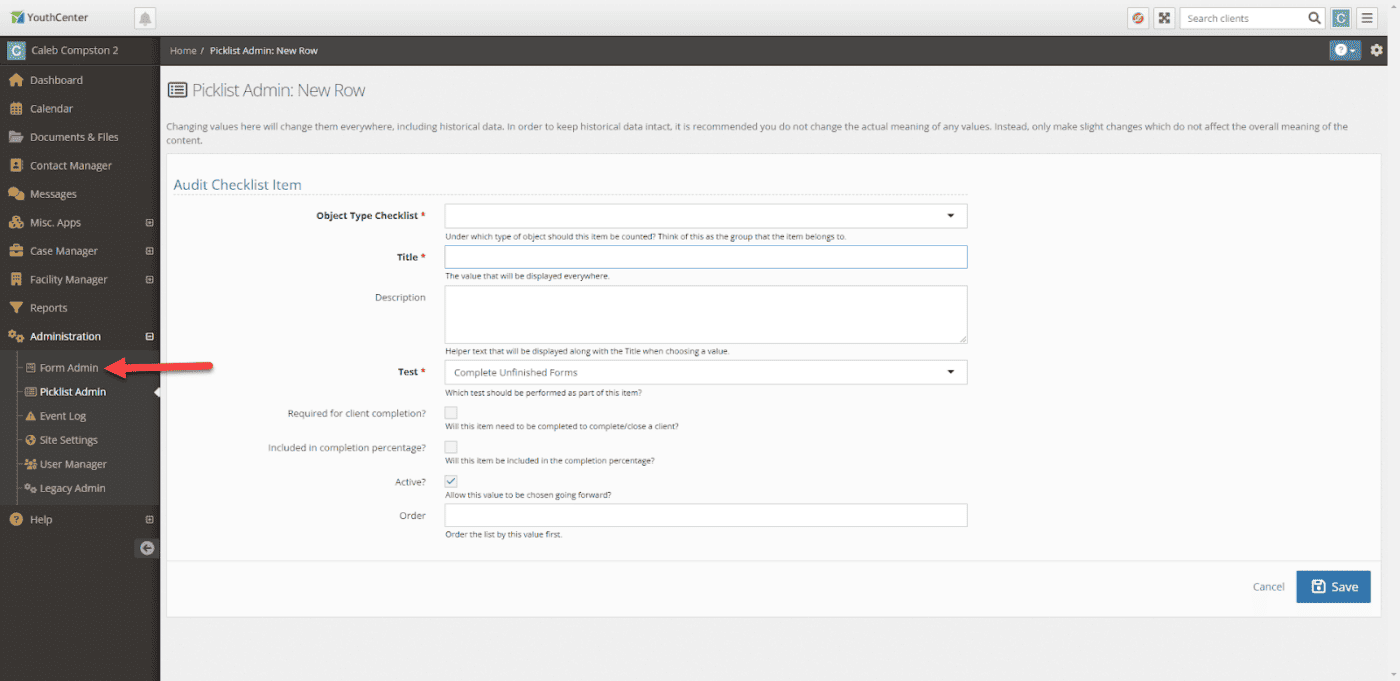
Select the form you wish to modify. Next, select the field you wish to require and select the edit pencil and paper icon.
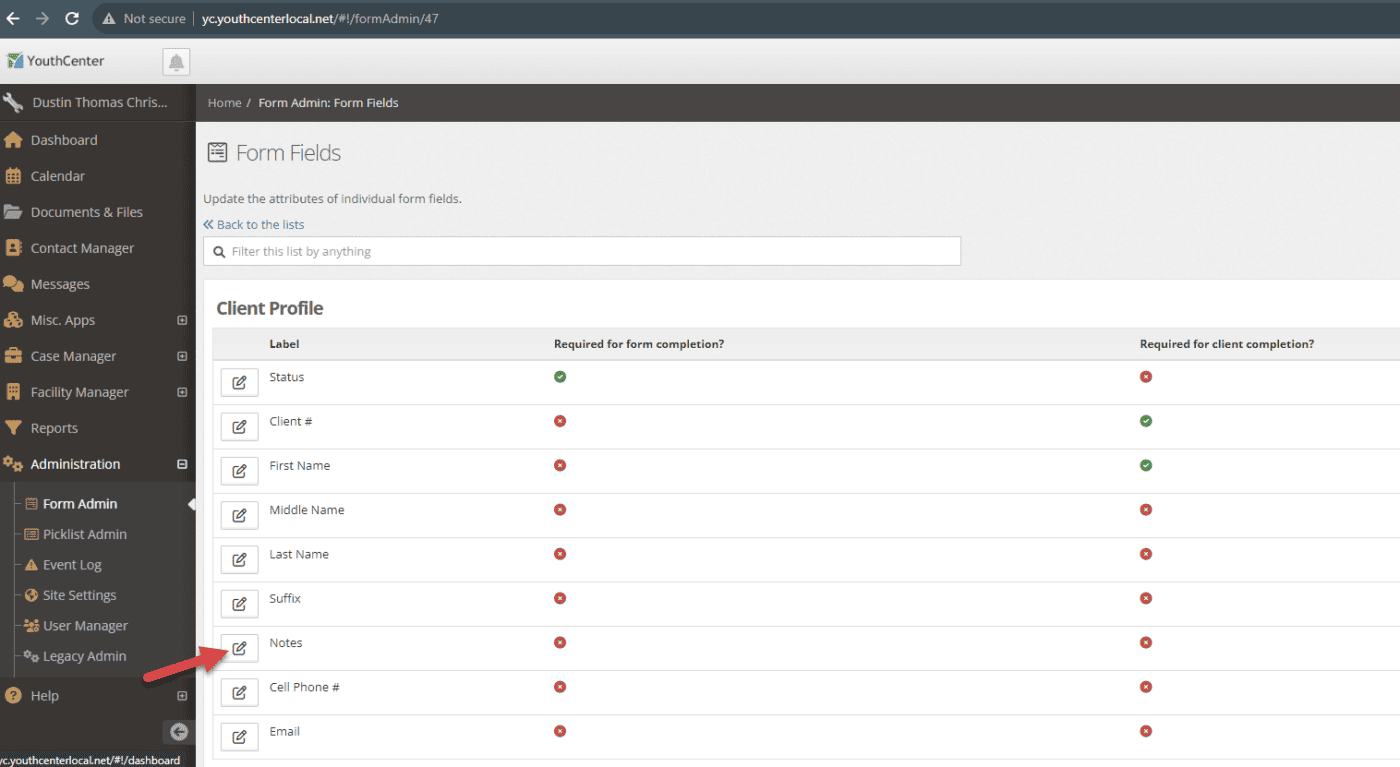
Finally, select the required-to-complete and or required-to-close options you want for your organization and press save.

Other checks
Additional checks for items like requiring mugshots can be toggled on and off in the Picklist Admin in the Audit Checklist Item list.
Creating Manual Checks
Sometimes, there may not be a field for a step your wish your team to complete. A common example is requiring your staff to double-check the spelling of a name vs the documents provided by the court or referring agency. You can create manual steps that are not tied to data entry. To add a new manual check, select the picklist admin under administration. Next select the Audit Checklist Item and press the green Create button. Add a title and description to the checklist item and press save.
In the audit checklist a new item will be created with a button to mark the step complete:

A completed step can also be marked incomplete.
Monitoring Audit Checklist Completion
You can monitor how your clients or the clients of your team members are doing on the audit checklist by adding it to the Clients widget.

You will then be able to see at a glance how much information has been collected! To add the % complete column to a Clients widget, select the gear icon on the client widget, then scroll to the bottom of the list and check the % complete checkbox:
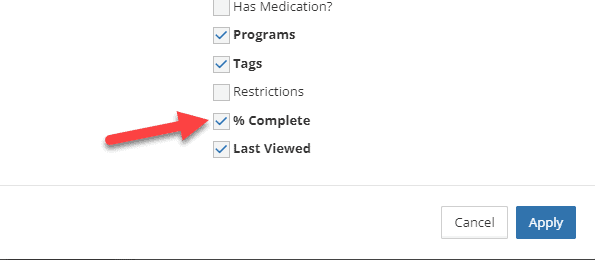
Finally, press apply.
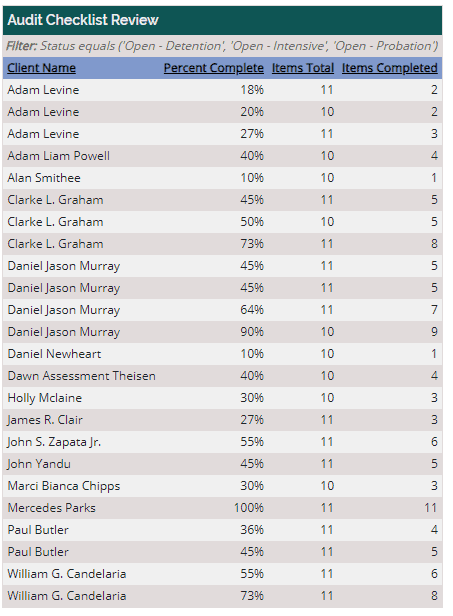
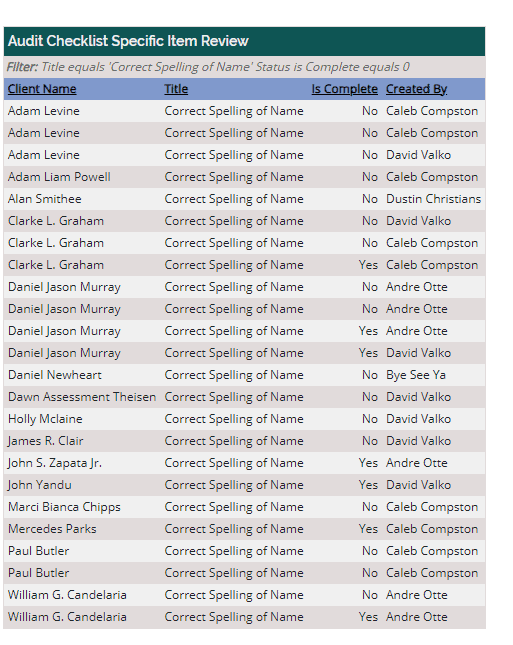
You can also run reports that track completion status. You will want to use the Client: Case Completion Checklist to retrieve overall completion. If there is a specific area you wish to drill down into, you can use the Client: Case Completion Checklist Items and filter down to review a specific set of information.
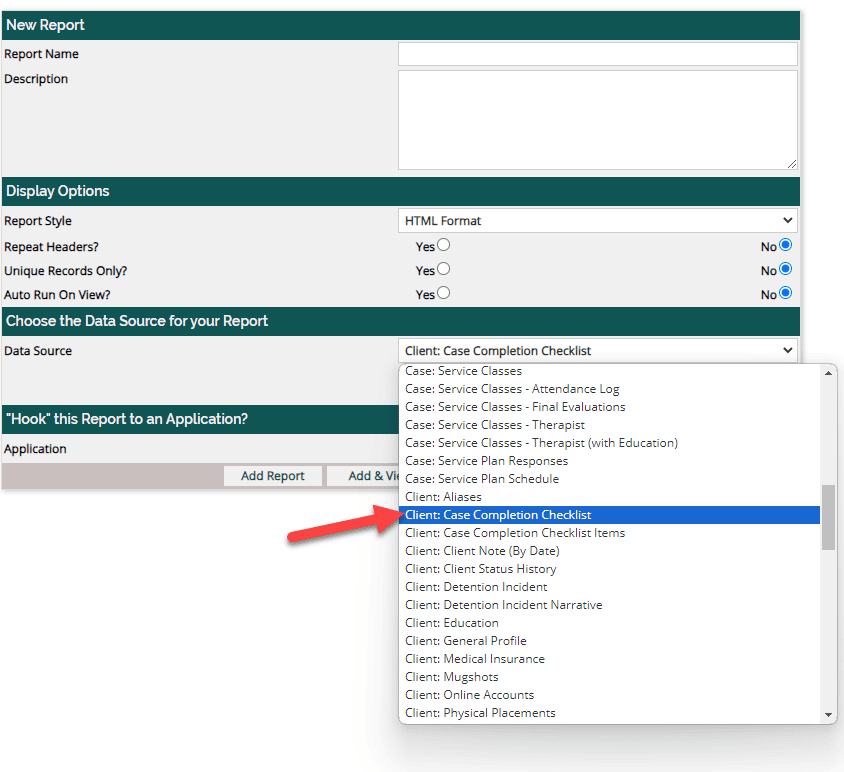
As you can see from the below screenshot, I can quickly see the percentage of completion and filter down the list to groups that interest me.
If your team is struggling with a specific area, you can also review by item:
Developing a completion strategy
By default, the audit checklist has a few items turned on, but we highly recommend customizing the checklist with items that your organization frequently has to report on.
Providing Feedback
YouthCenter continues to be a solution built for and directed by your needs as caseworkers, JPOs, administrators, and more. Your feedback is very valuable, if you have any thoughts or ideas on how we can improve the software, please reach out to us via our suggestion form. New ideas are reviewed on a bi-weekly basis.
