This August, YouthCenter is rolling out updates to improve clarity, consistency, and customization. Highlights include square mugshots for cleaner records, referral tracking in program placements, therapist visibility in client summaries, and new control over Built-In Form fields. Analytics get a boost with default shared dashboards and unit-based filtering for Detention and Residential widgets.
This update is scheduled to go live on 8/24/2025 at 11 PM EDT (Click here to see the time in your timezone).
Make Mugshots Square
Having a clear and consistent visual representation of the youth you are working with is an important part of YouthCenter documentation. With this in mind, you can now create consistent mugshots by cropping them to a square aspect ratio.
Crop to Square feature
Adding a mugshot/profile picture will be the same as prior (for more detailed steps on how to add a new mugshot, see documentation here). However, when adding a new mugshot, you are now given a checkbox option that will allow you to crop and focus the image.
The new checkbox will be titled “crop to square.”

If this box is selected, before uploading the image, a cropping area will appear to help with sizing the image to match your needs.

Once “crop and save” is selected, the newly formatted image will appear for your approval before saving.

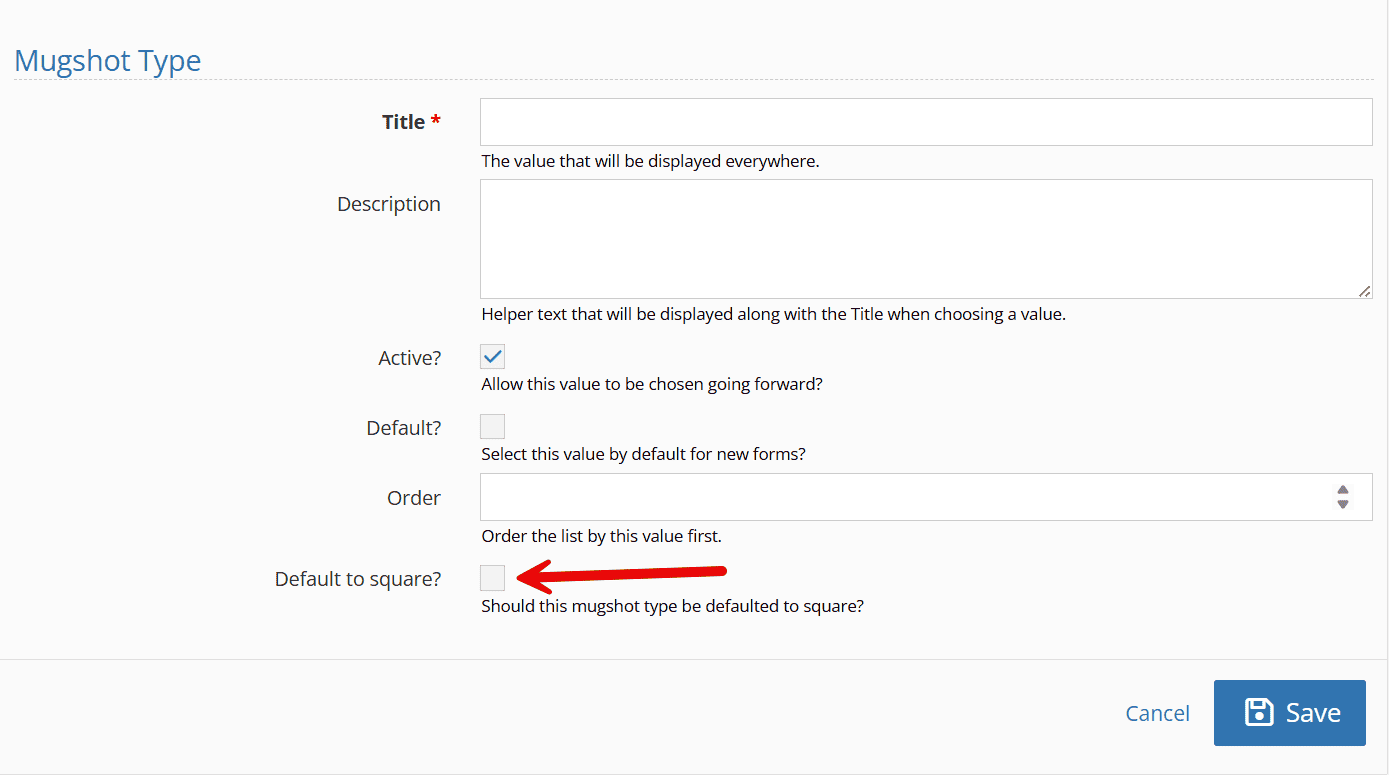
Defaulting the Crop to Square feature
If you would like to ensure this cropping ability is set for all future mugshot uploads, update the “mugshot type” under your picklist admin.
To access this, select the administration tab, followed by “picklist admin.”
Search and select “mugshot type.”

Choose “default to square” and click “save.” (Update after helper text changed)
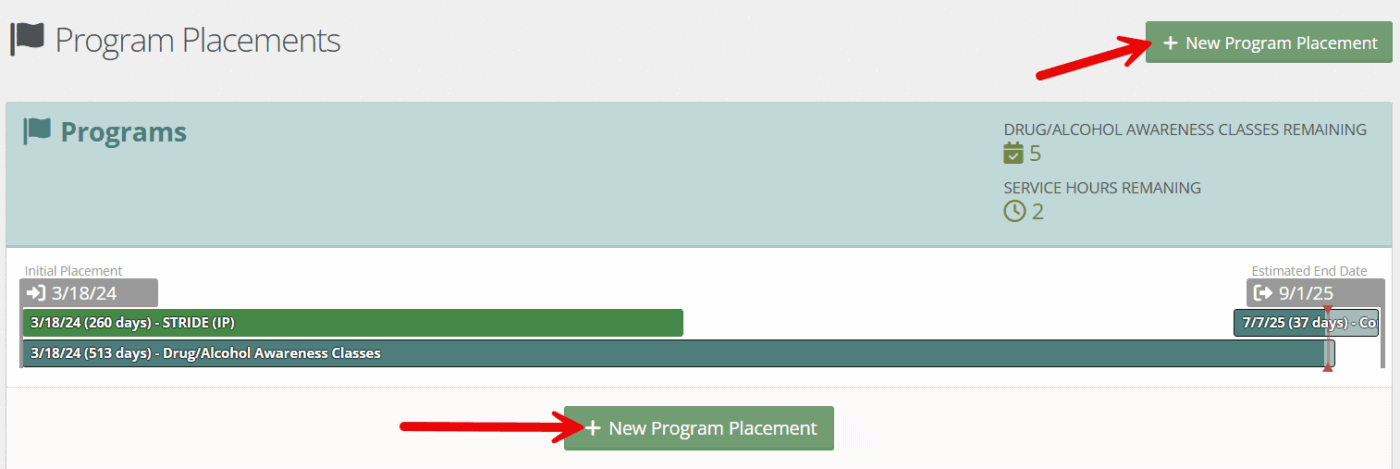
Referrals within Program Placements
Under program placements, organizations can now be listed as referrals.
This data surrounding referrals can then be easily reported on as needed using the data source of “client: program placements.”
There are three main steps to setting up referrals under program placements. These include:
- Adding/editing a company to set up for referrals
- Adding the referral to a program placement
- Setting up the picklist to support the referral status that matches your needs
Below are steps outlining each of these areas.
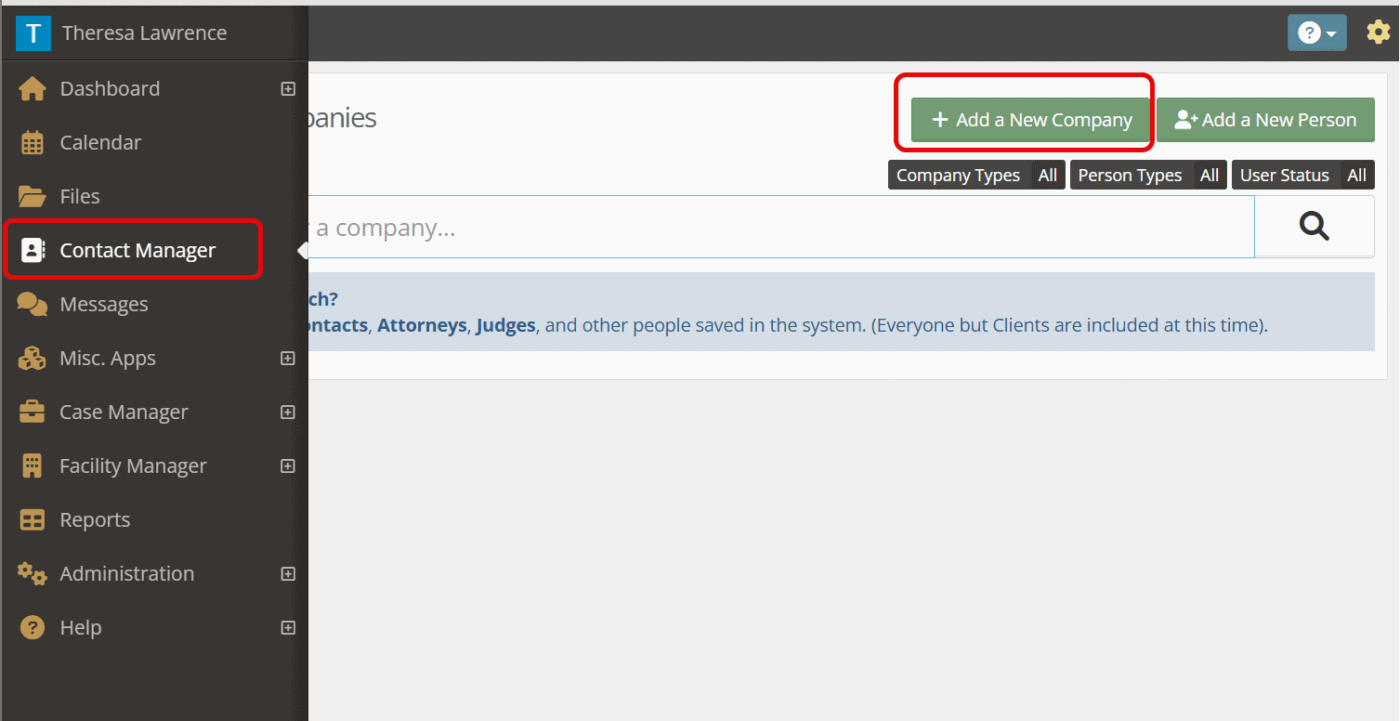
Adding a Company to Setup for Referrals
To add a new company for referrals, click on the “contact manager” tab.
Choose “add a new company.”
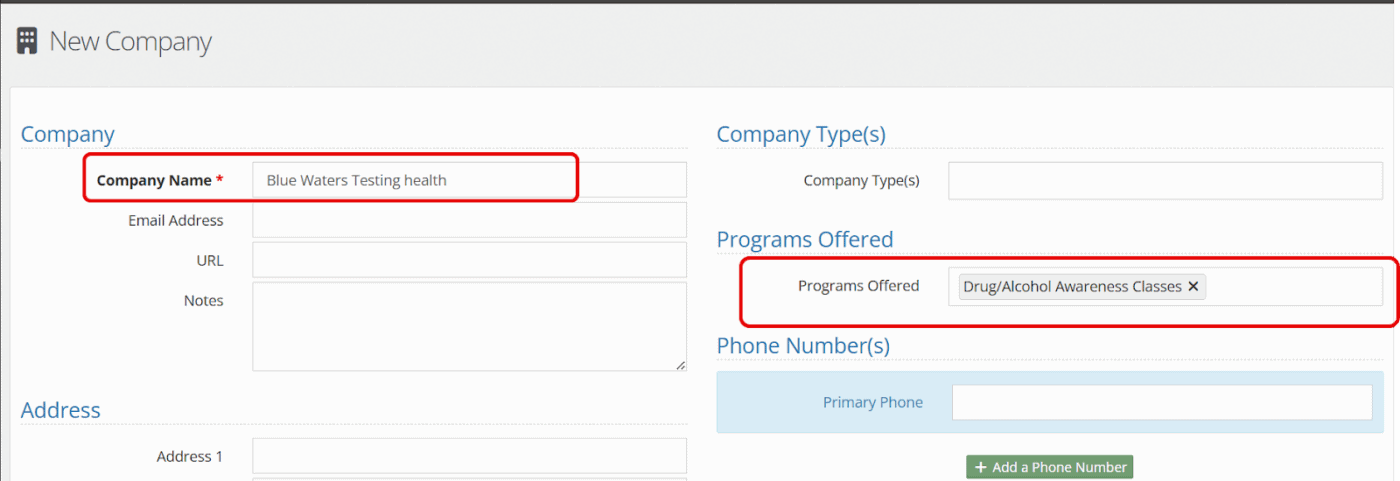
The two fields necessary for referrals will be “company name” and “programs offered.”
Fill in any additional information and click “save.”
Adding a Referral to a Program Placement
Choose the client for which the program placement is being created, and choose “program placement” under their main menu.
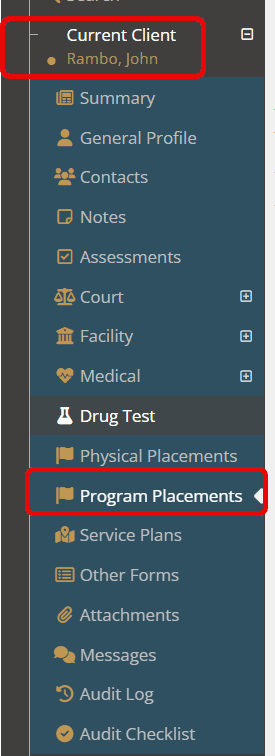
Choose “new program placement.”
Fill in the necessary information. For more information on program placements, see additional documentation here.
*Note* the referred to drop-down will not appear until after selecting a program.
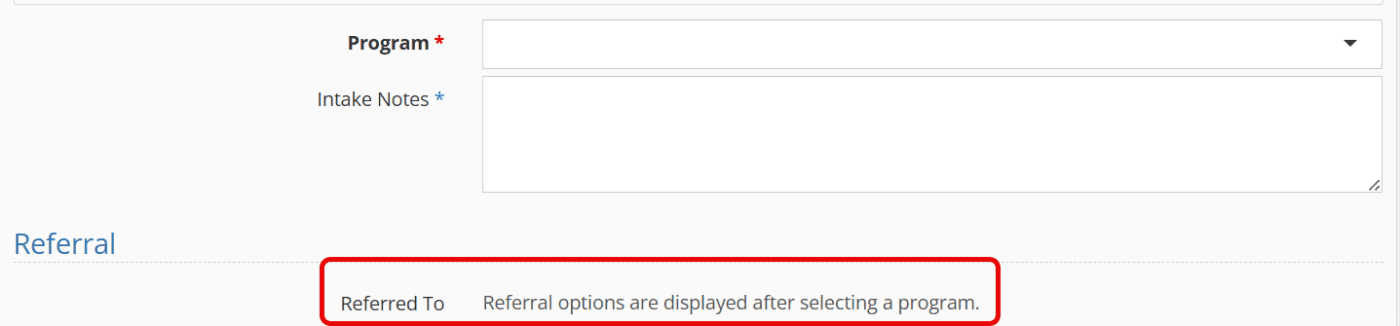
Fill in the necessary referral fields.
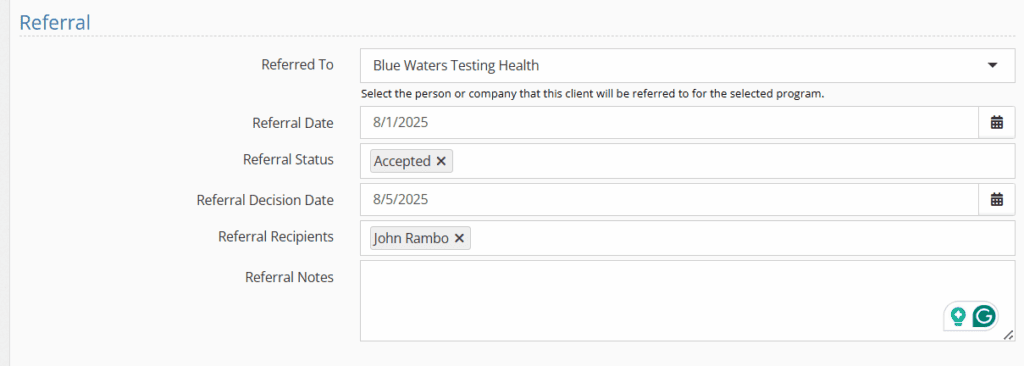
Field descriptions:
- Referred To: Program or person that the referral program placement is associated with.
- Referral Date: Date of referral
- Referral Status: Status of referral (multiple options can be chosen). Administrators have the ability to add to these options through the picklist “Program referral status.”
- Referral Decision date: Date when the decision was made for the referral.
- Referral Recipients: Recipient can be either the youth or any of their contacts (ie if a parent is referred to counseling).
- Referral Notes: Any notes associated with the referral.
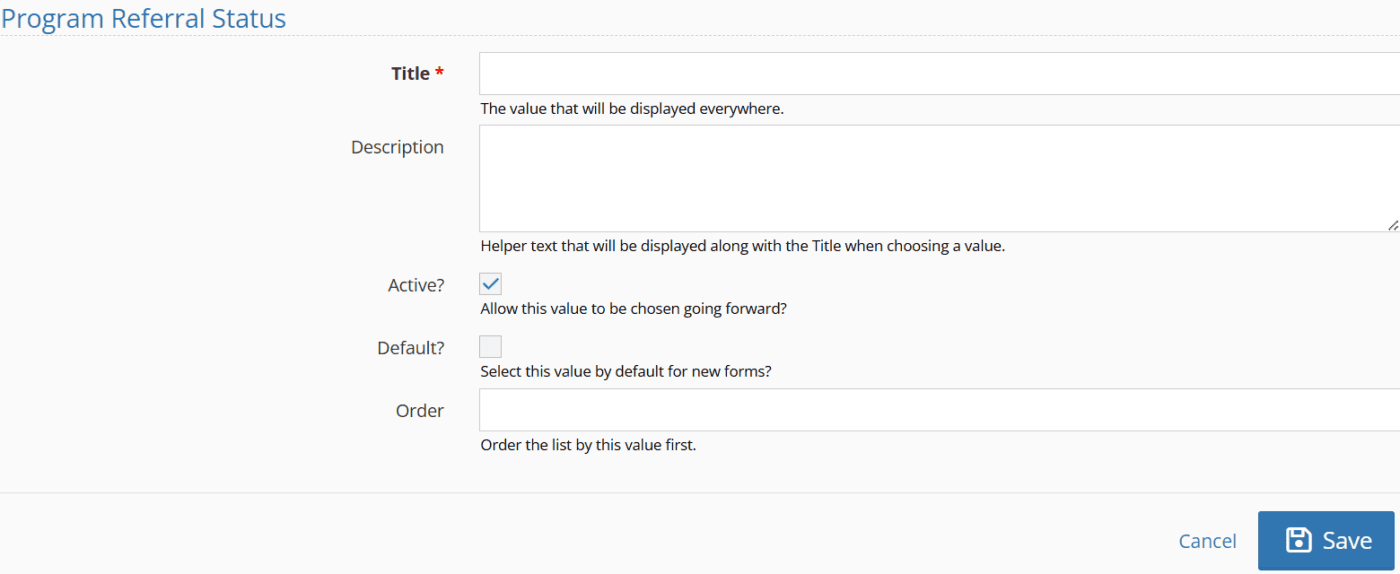
Setting up Picklist
To access the “program referral status” picklist item, click on the “administration” tab followed by “picklist admin.”
Search and choose “program referral status.”
Select the green “create a new program referral status.”

Fill in the necessary information and click “save.”
Therapists in Client Summary
To allow for quick visibility of your full team, the team member “therapist” has been added to the client summary.
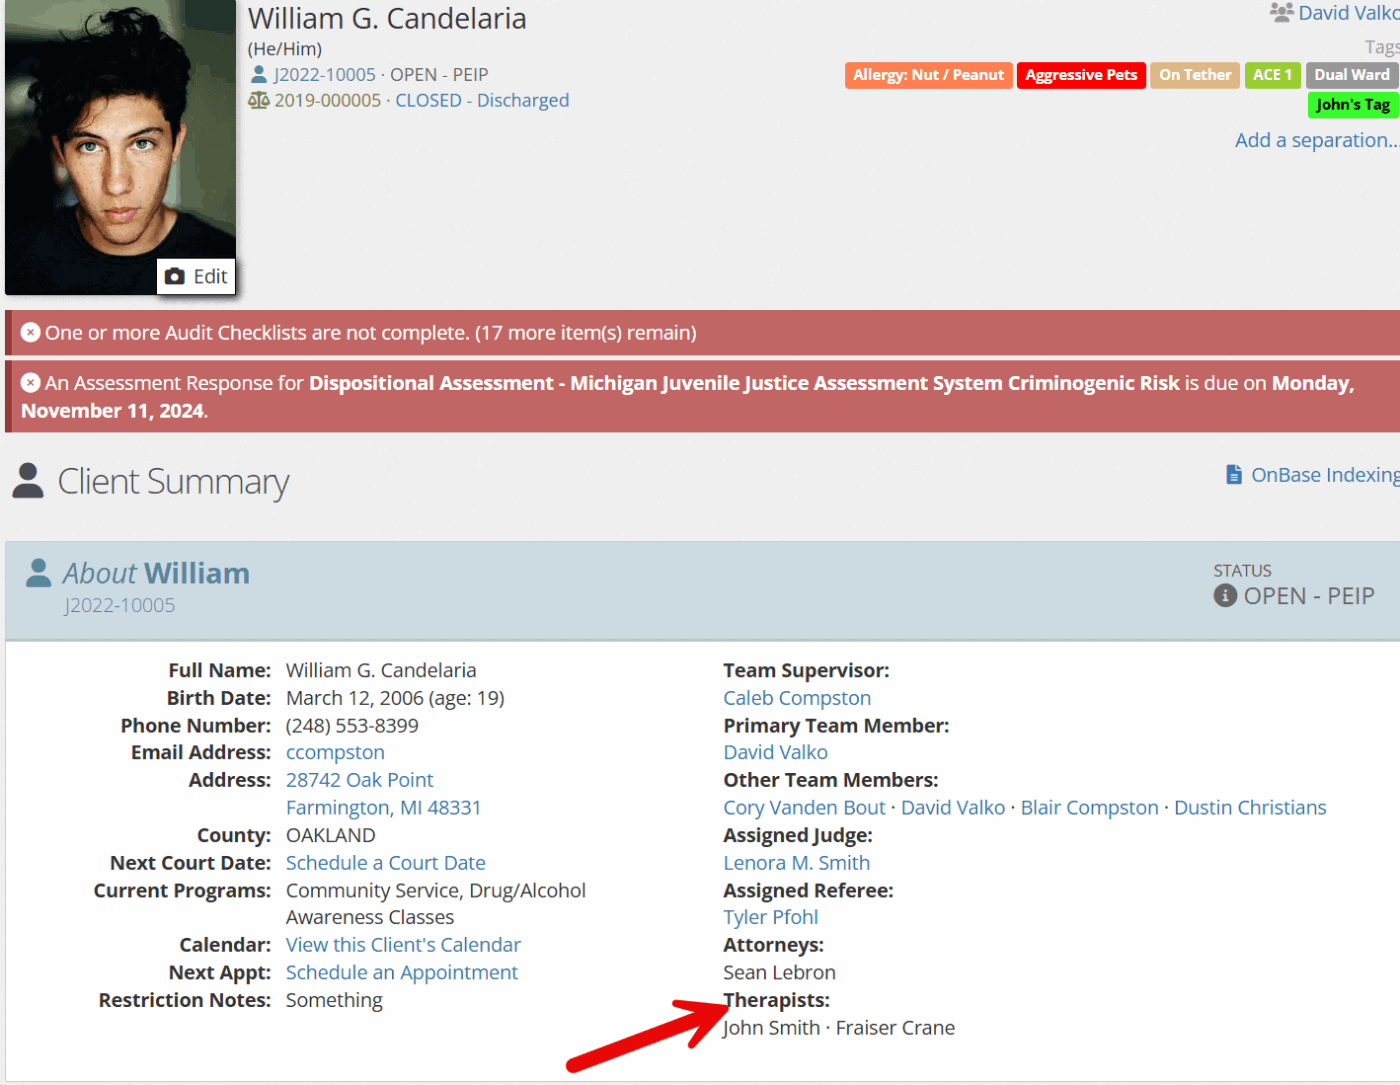
For more information on modifying the client team members, see the documentation shared here.
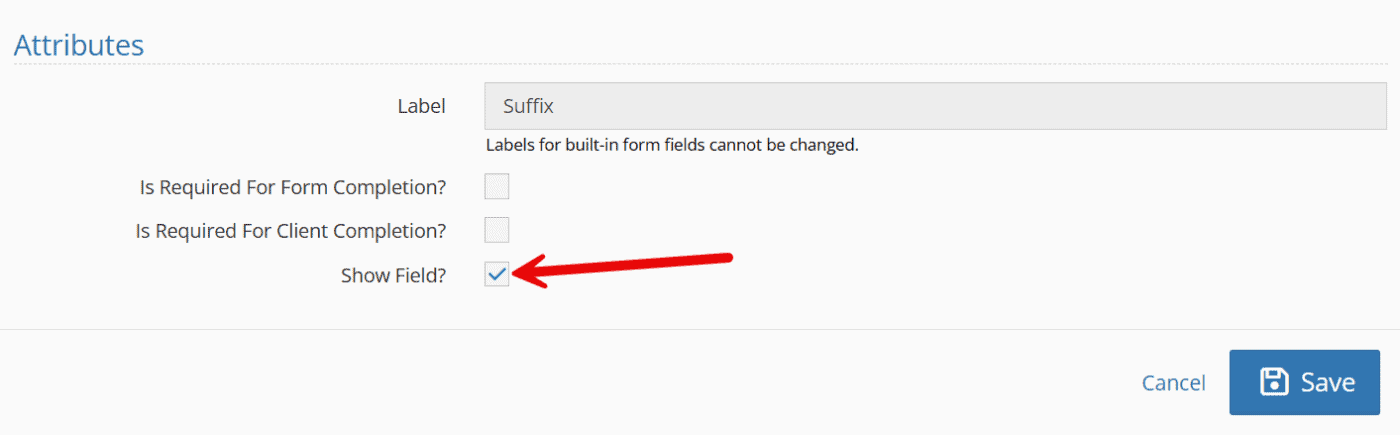
Admins show/hide fields in Built-in Forms
For any Built In Form, a new property is now present titled “Show Field.” This will allow administrators to determine what fields are completed by their team and which are not.
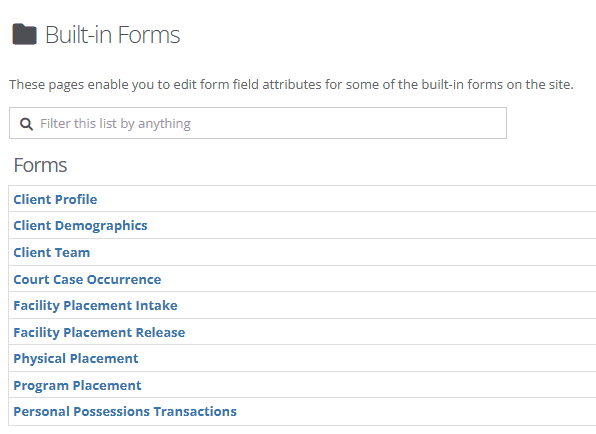
The built-in forms include the following:
Adding or Removing Fields From the Built-In Forms
To access these forms and update the new check box, click on the “administration” tab followed by “form admin.”

Choose “Built-In Forms” followed by the form of your choice.
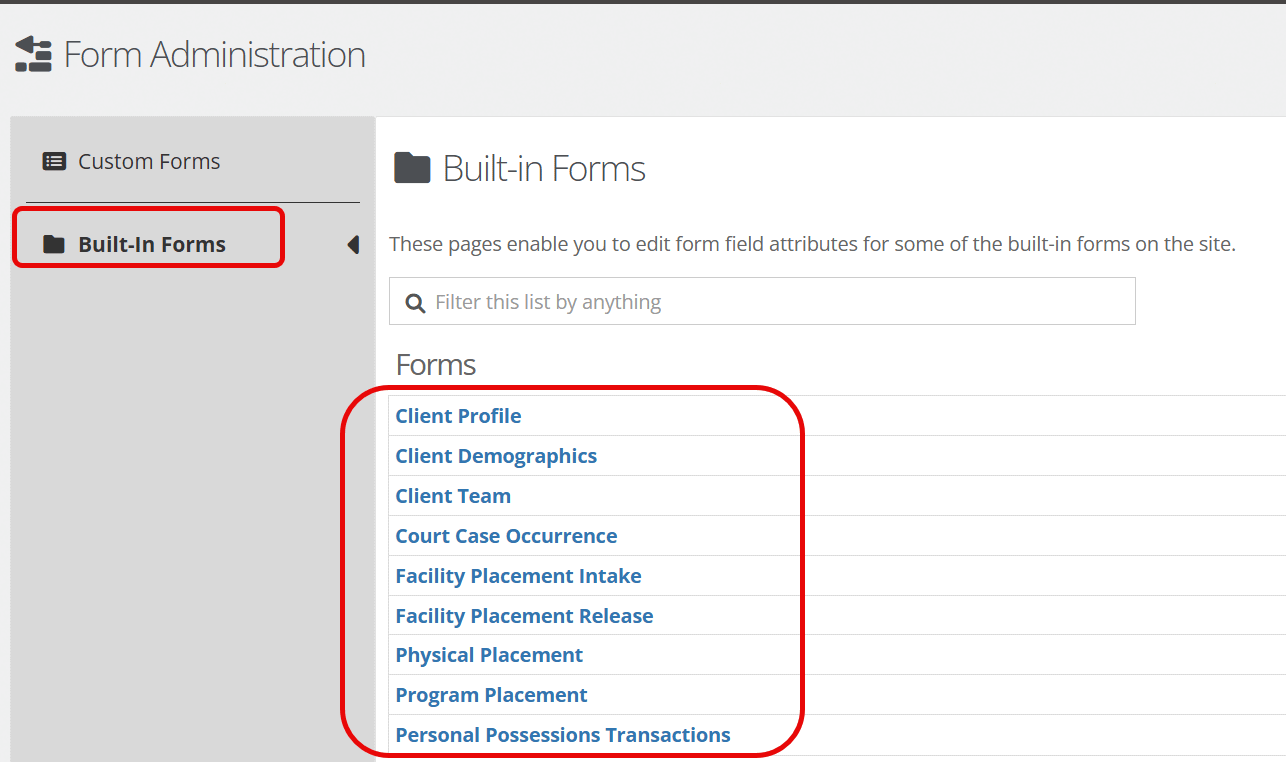
Automatically, you will be shown all of the fields available in this form and will also see the following:
- Label
- Required for form completion
- Required for client completion
- Show Field
For more details on fields outside of “show fields”, see the documentation here.

To adjust whether a field is seen and completed by your team, select the “edit this row” option (left of the field you’d like to edit).
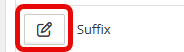
- To ensure this field is NOT shown and filled out by your team, deselect the check box to the right of “show field.”
- If you DO want this field to be shown and filled out by your team, ensure the checkbox is selected.
Click “save”
NOTE: There are fields within the Built-In forms that can NOT be unchecked.
These include the following for each specific form:
- Client Profile Form
- Status
- Client #
- First Name
- Last Name
- Cell Phone #
- Court Case Occurrence Form
- Status
- Open Date
- Close Date
- FP Intake
- Intake Date
- FP Release
- Release Date
- Physical Placement Form
- Intake Date
- Release Date
- Placement Type
- Care Provider
- Program Placement Form
- Intake Date
- Program
- Release Date
Dashboards: Allow for a shared dashboard to be the default
In recent releases, users have been able to share dashboards (for more information, see the documentation shared here). Building off this release, a shared dashboard can now become a user’s default dashboard.
Making a Shared Dashboard the Default.
From your list of dashboards, choose the dashboard title you would like to be your default.
Note: Any time a dashboard is shared with you or by you, you will notice a grouping of three people to the right of the dashboard title.
To make a shared dashboard your default, select the down carrot to the right of the dashboard name. Choose “set as default.”
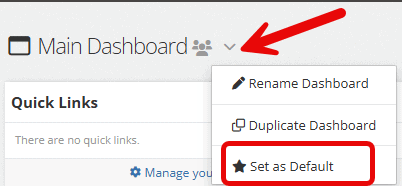
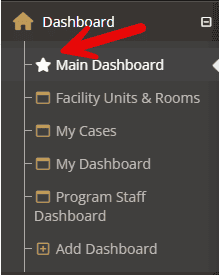
Making a dashboard your default will allow the dashboard to appear at the top of your list of dashboards and will also add a small star next to this dashboard in the list for easy access.
Detention/Residential: Widgets to Filter By Unit
For those in Detention or Residential, many of the widgets have been updated to allow for filtering by units. This will show only clients in selected units and allow users to build dashboards specific to units.
How to Filter by Unit Using Widgets
On the dashboard, you would like to add or update a widget, select “Manage Dashboard.”

Select the green “Add Widgets” button.

The following widgets have a Filter By Unit property and can be chosen from the list:
- Upcoming Assessments
- Pending Assessments
- Daily Log
- Visitations
- Incidents
- Upcoming Service Plans
- Clients In Facility (Convert the checkboxes to the multiselect)
- Clients In Programs
- Medication Schedules
- Recent Facility Placement Events
Once the widget has been added, select the gear icon that will allow you to “edit the widget configuration.”

You will now see a “filter by unit” option under “who should show.” Multiple units can be selected a time.
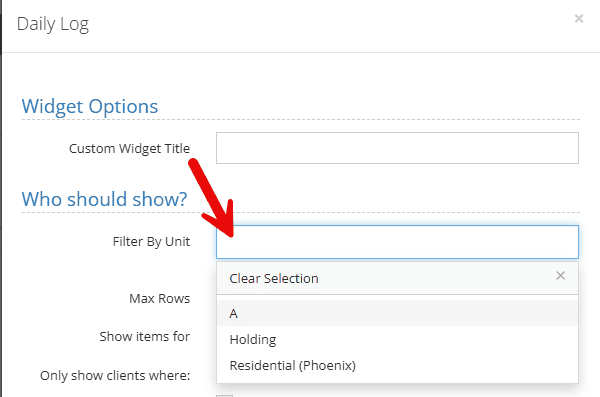
Once completed, click apply
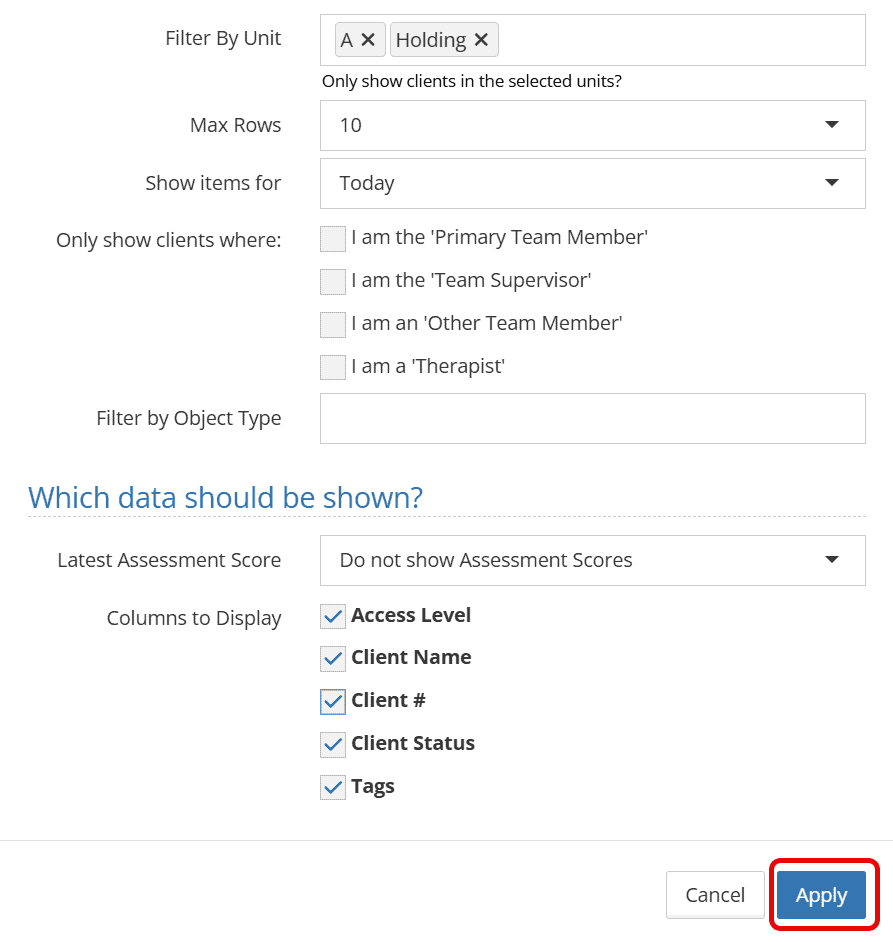
Select “save changes” on your dashboard.

For a webinar on using the dashboard manager, please see the link shared here. For information on filtering using widgets, see the documentation shared here.
Providing Feedback
YouthCenter remains a platform shaped by the needs of caseworkers, JPOs, administrators, and all who use it daily. Your feedback plays a vital role in its growth and improvement. If you have suggestions or ideas for enhancing the software, please share them with us through our suggestion form, which you can access here. We review new submissions every two weeks.