The February beta to release will provide some additional insight to your clients from the new interface and providing better communication with the client team when entering in information about your clients. Check out the Beta release notes below on the new features available to start testing Wednesday 2/21 in your beta site!
Dashboard Widgets
We’ve had requests from many of our users to make more information about clients available in dashboard widgets. We’ve added a few new items that should help provide a quick update on the juvenile’s status from the widgets including:
- Tags
- Programs
- Next Court Date

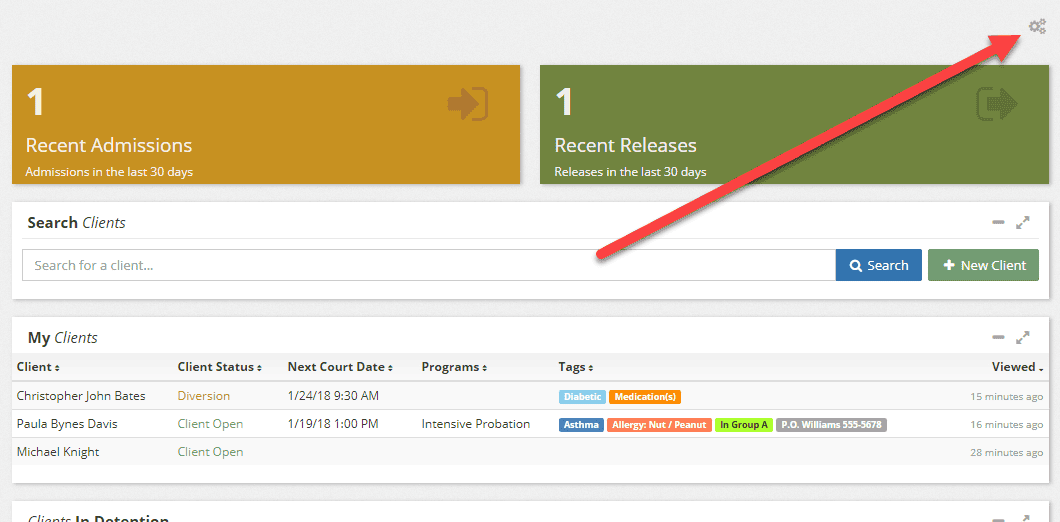
These columns can be added to the My Clients and Clients in Detention widgets. To add them to the widget, use the gear icon in the upper right of your dashboard as shown:
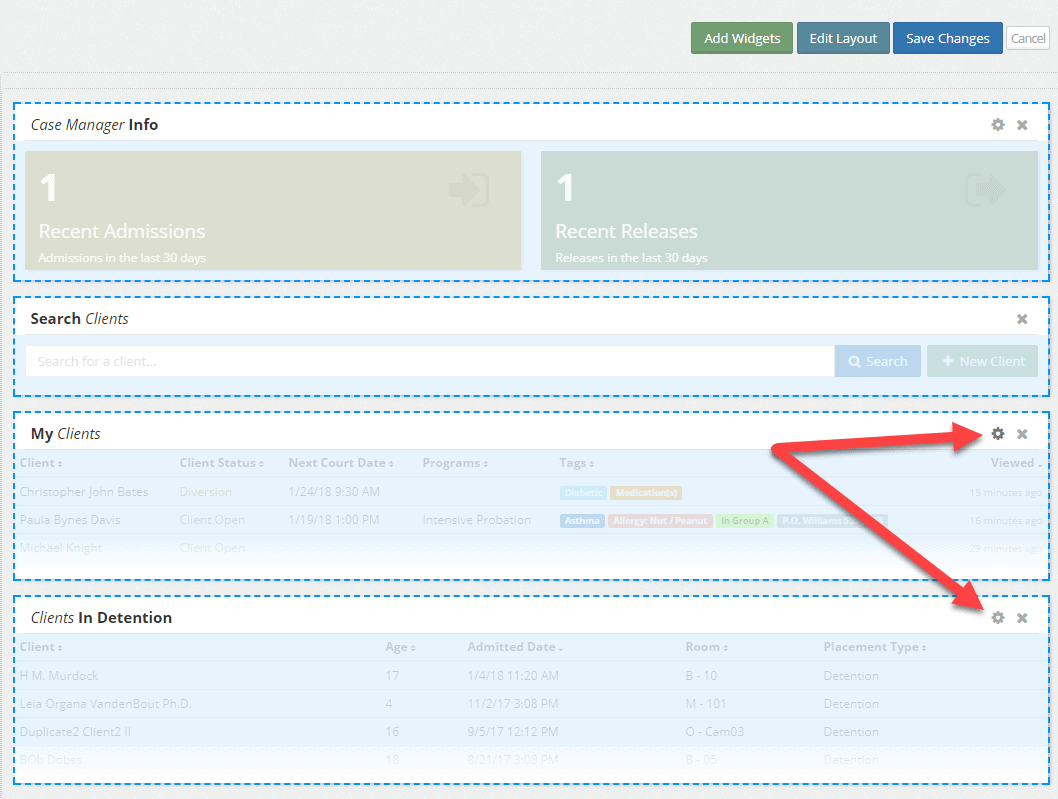
Select the gear in the widget to edit the fields available:
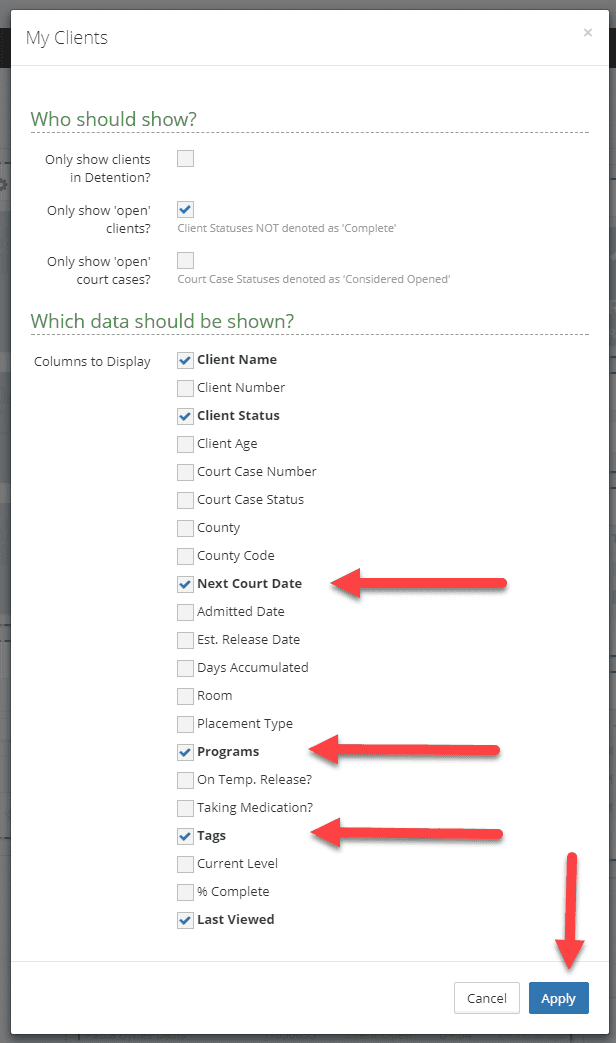
Then check the fields you want shown in the widget and select Apply to close the widget editor.
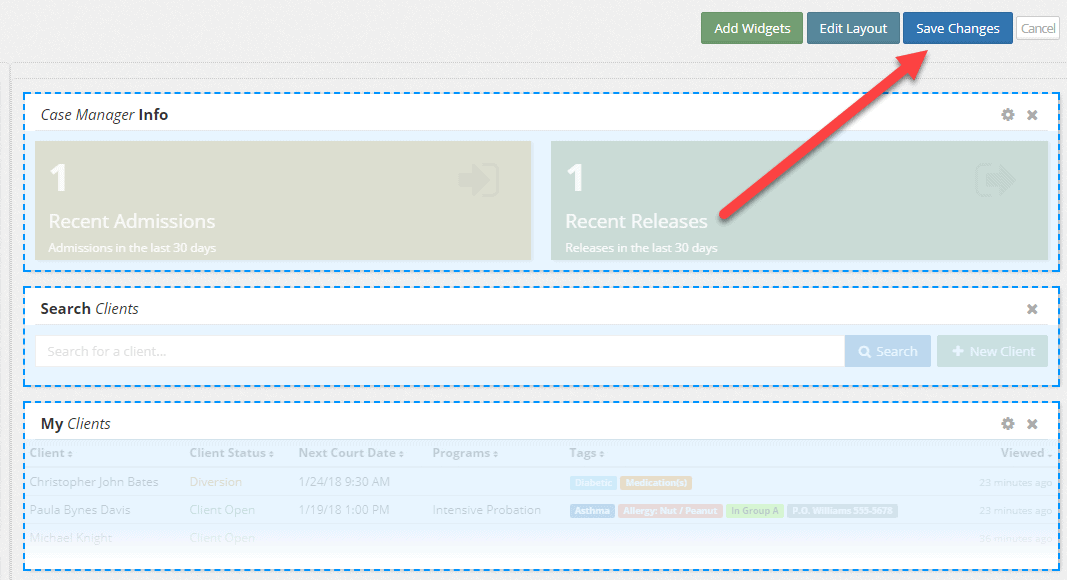
Choose Save Changes from the dashboard editor and your widget will show the new fields.
Tags
Tags have been an important feature for case managers, PO’s, medical staff, and others involved with juveniles. Tags provide a quick reference to important attributes of the client. This release allows tags to be added to not only clients, but attachments as well.
Visibility of tags in the new interface
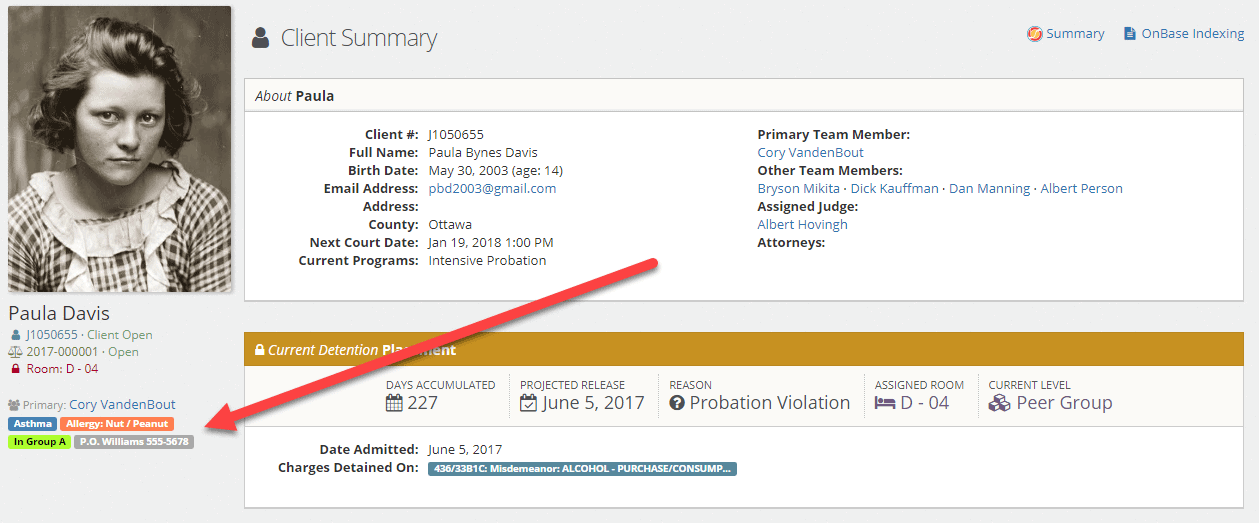
We’ve seen how tags can be seen in widgets:

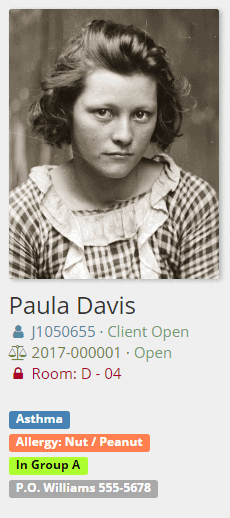
Tags may also be seen on the client as shown below:
Adding tags in the new interface:
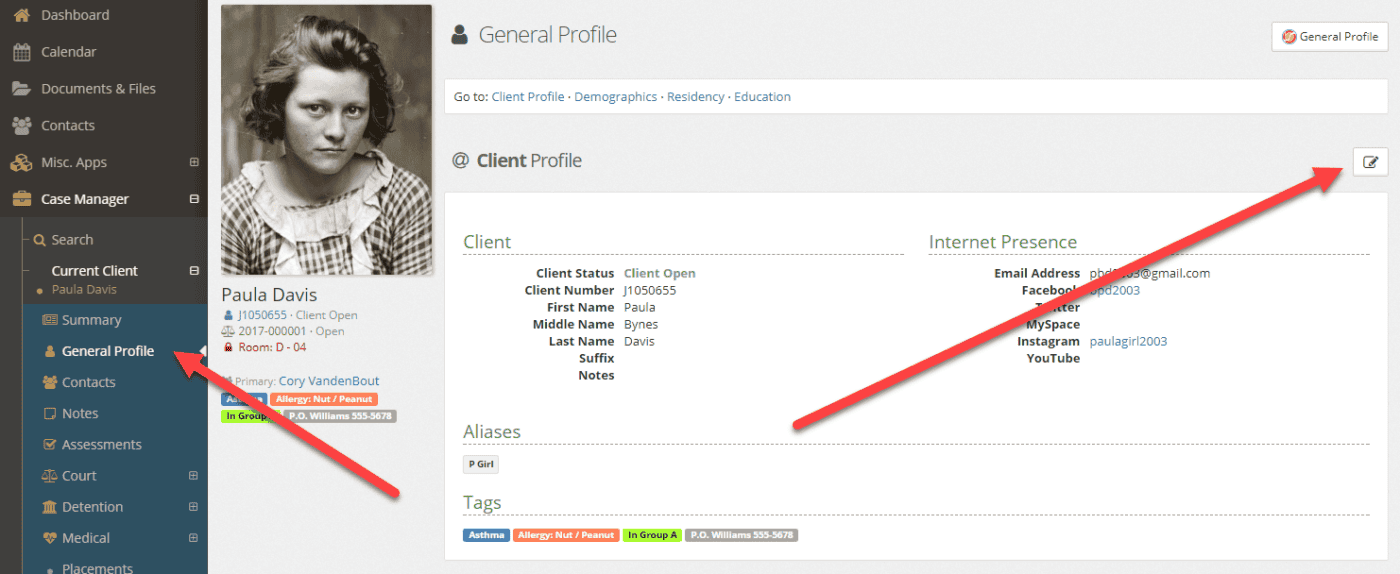
Up until now, tags needed to be entered in using the old interface. To add tags to a client in the new interface, select General Profile and Edit under the Client Profile.
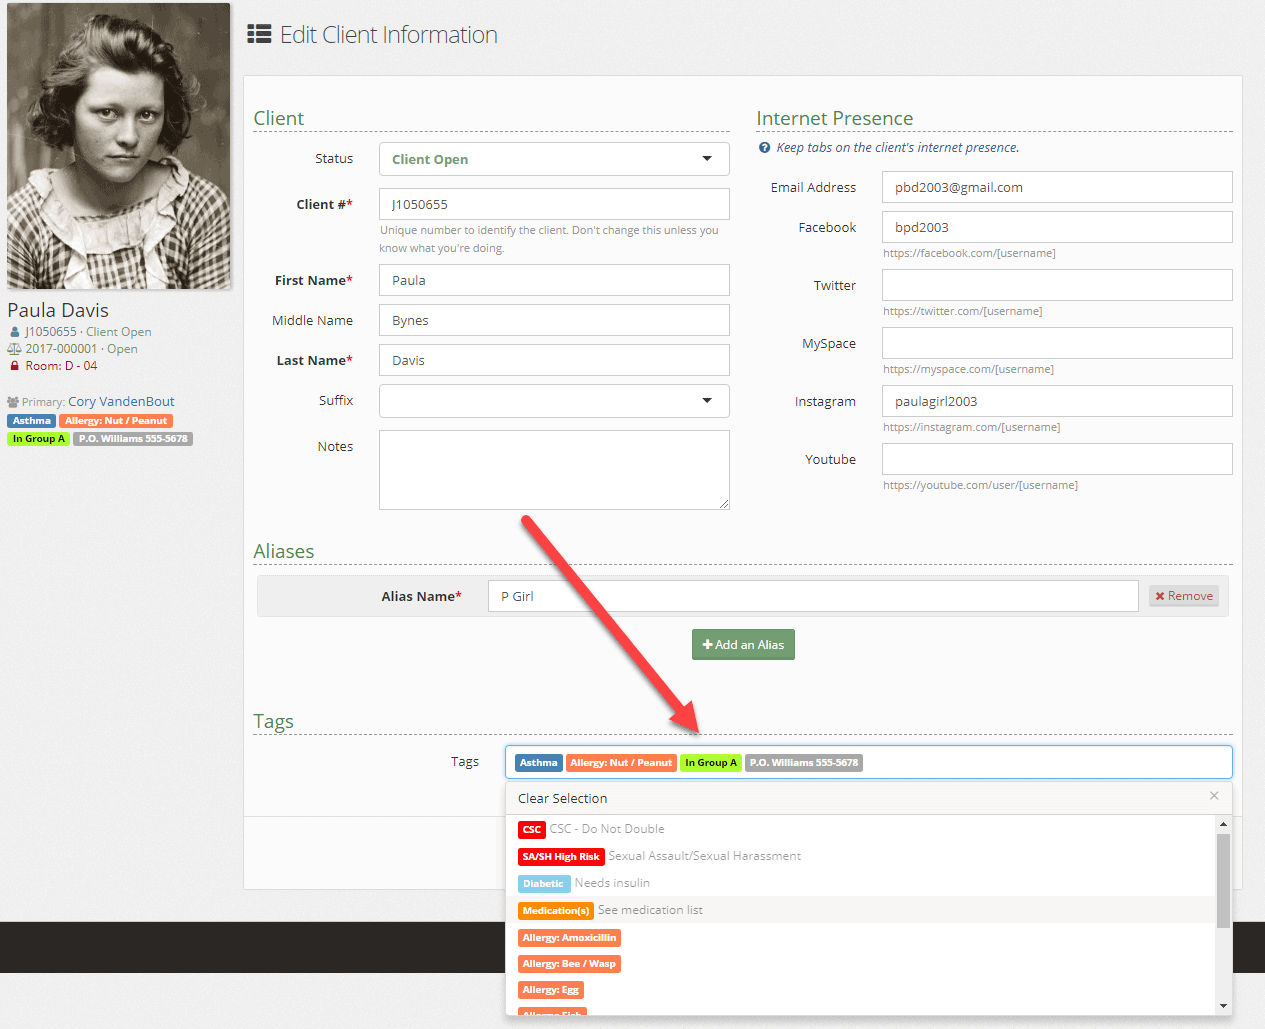
Start adding tags from the list available. A preview of the tag colors and their description/tooltip is also shown in the list:
Tags on attachments
To help make attachments easier to identify, we’ve added tagging to attachments. Attachment tags can be different than client tags, however administrators may allow for shared tags.
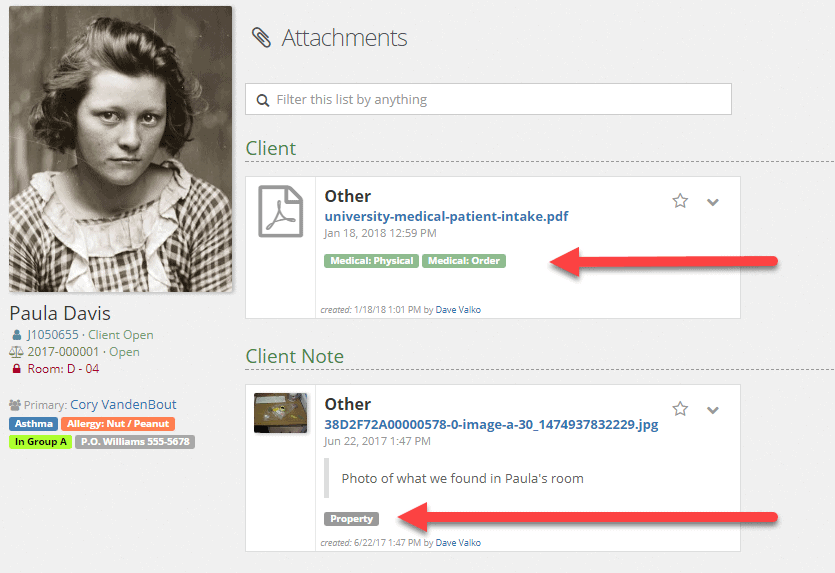
Attachment tags are added when adding an attachment to any object within YouthCenter:

Tag Administration
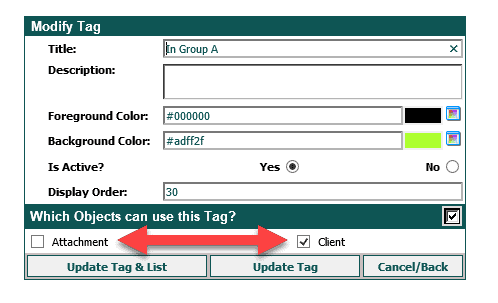
Tag administration can be found in the old interface under Case Manager (or Detention) > Administration > Tags. Your existing tags will be listed, however new options will be available when editing or adding a tag.
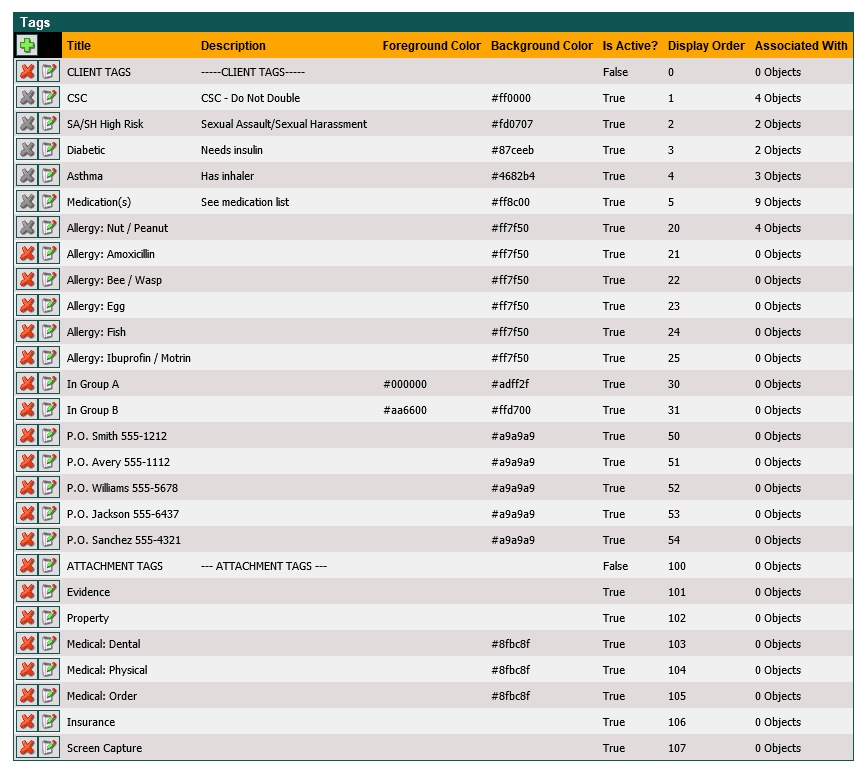
The tag editor has options for the title, description, a foreground color (text color), background color (tag color), active flag, display order, and selectors for what object(s) can use the tag:
Background colors are an easy way to display alike tags. In the tag list example above, you’ll notice that all Allergy tags use the same color code #ff7f50.
Foreground colors allow for changing the color of text within a tag. This is particularly helpful when a lighter color is chosen for a tag as shown in the example below with the tag “In Group A”.
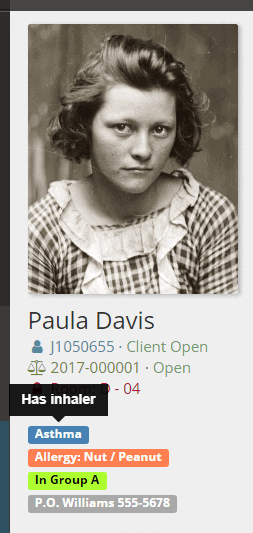
Description text will appear when a user hovers over the tag, or next to the tag when adding a tag to a client or attachment.

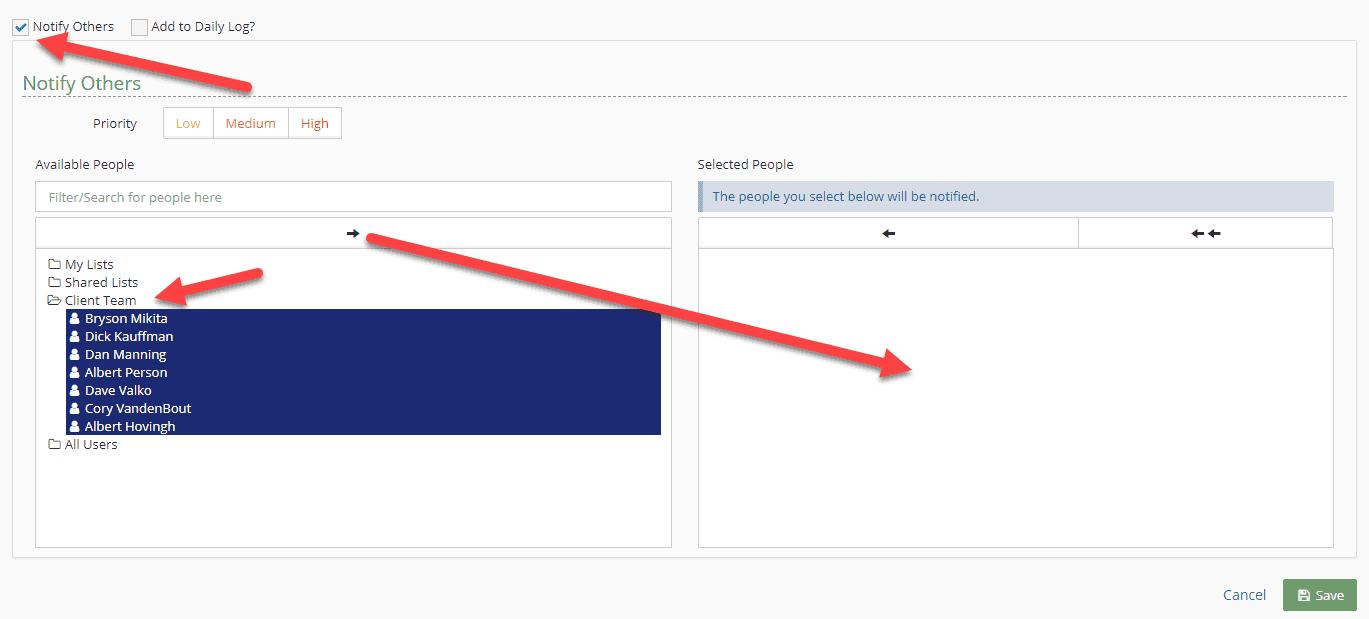
Client Team on Notifications
We’ve made it a lot easier to notify the entire client team by adding all client team members to a group within notifications.
When using the “Notify Others” checkbox on objects, you will see the Client Team folder. Select the folder and all client team names will the highlighted. Select the right arrow as shown to move those names to the Selected People column and click Save.
Your input is valuable!
Along with the above beta items, with your input, we’ve made some additional improvements around the speed of the application, general design, and usability. These improvements don’t come without your input.
Please take some time and enter a few clients into your Beta site and use the new features. Finding and fixing bugs prior to a live release makes it easier on us all. Your team gets improvements made before going to live – not after it’s out there.
If you need assistance on how to access your Beta site, please contact us and we’ll work with you to get you logged in and using the Beta site.