While we didn’t do a full release in December, our team quietly rolled out a handful of small but helpful updates during our regular midweek hotfixes. These include moving the shared people lists to the Picklist Editor and expanding it’s capabilities, adding more options for incidents, and adding some user requested filtering to dashboard widgets.
Shared People Lists
As a reminder, a shared people list allows team members to quickly share information with a preset list of users in YouthCenter.
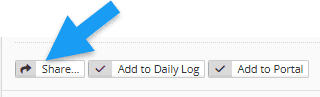
Some modules in YouthCenter, such as a note for example, users can bring up a shared people list. To do this, you will press the “share” button as shown below.
The new updates include:
- Global Shared People lists based on user groups
- Updating the location of the previously Shared People lists
See below for details
Globally Shared People Lists based on User Groups
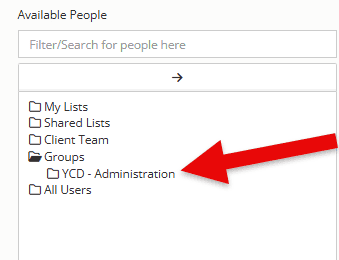
To allow a group to appear as an “available” group, as shown below, follow the steps after this image.
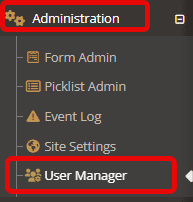
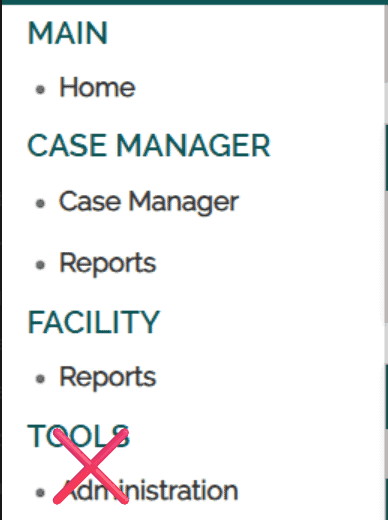
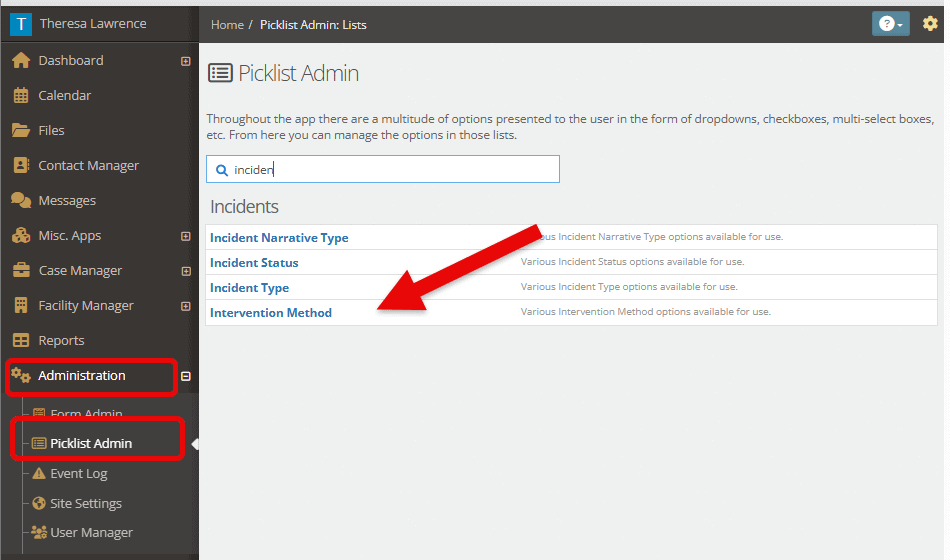
Step 1: Choose the “Administration” tab followed by “User Manager.”
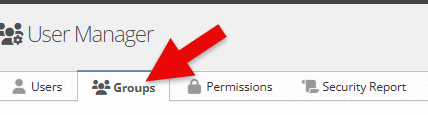
Step 2: Select “Groups” from the tab.
Step 3: Choose the “edit” button to the left of the group you would like to add to your list of sharing people picker options.

Step 4: Select the check box that states “show in people picker” and click “save.”

You will now have this particular group as an option to share notes, incidents, etc. with.
Updating the Location of the previously Shared People lists
To give a more seamless user experience, the shared people lists have been moved from the YouthCenter Legacy side to the “Administration” tab. As a reminder, a shared people list allows team members to quickly share information with a preset list of users in YouthCenter.
New location of the Shared People list:
Before this update, the shared people lists were available to create and update on the Legacy side of YouthCenter.
With this new update, these lists will now be available under the Administration tab.
Follow the steps below to access the location to update or create new people shared lists:
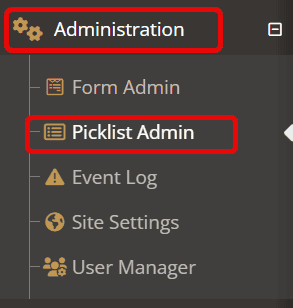
Step 1: Choose the “Administration” tab followed by “Picklist Admin.”
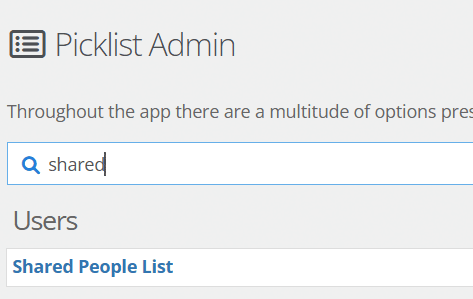
Step 2: Search for and select the “Shared People List.”
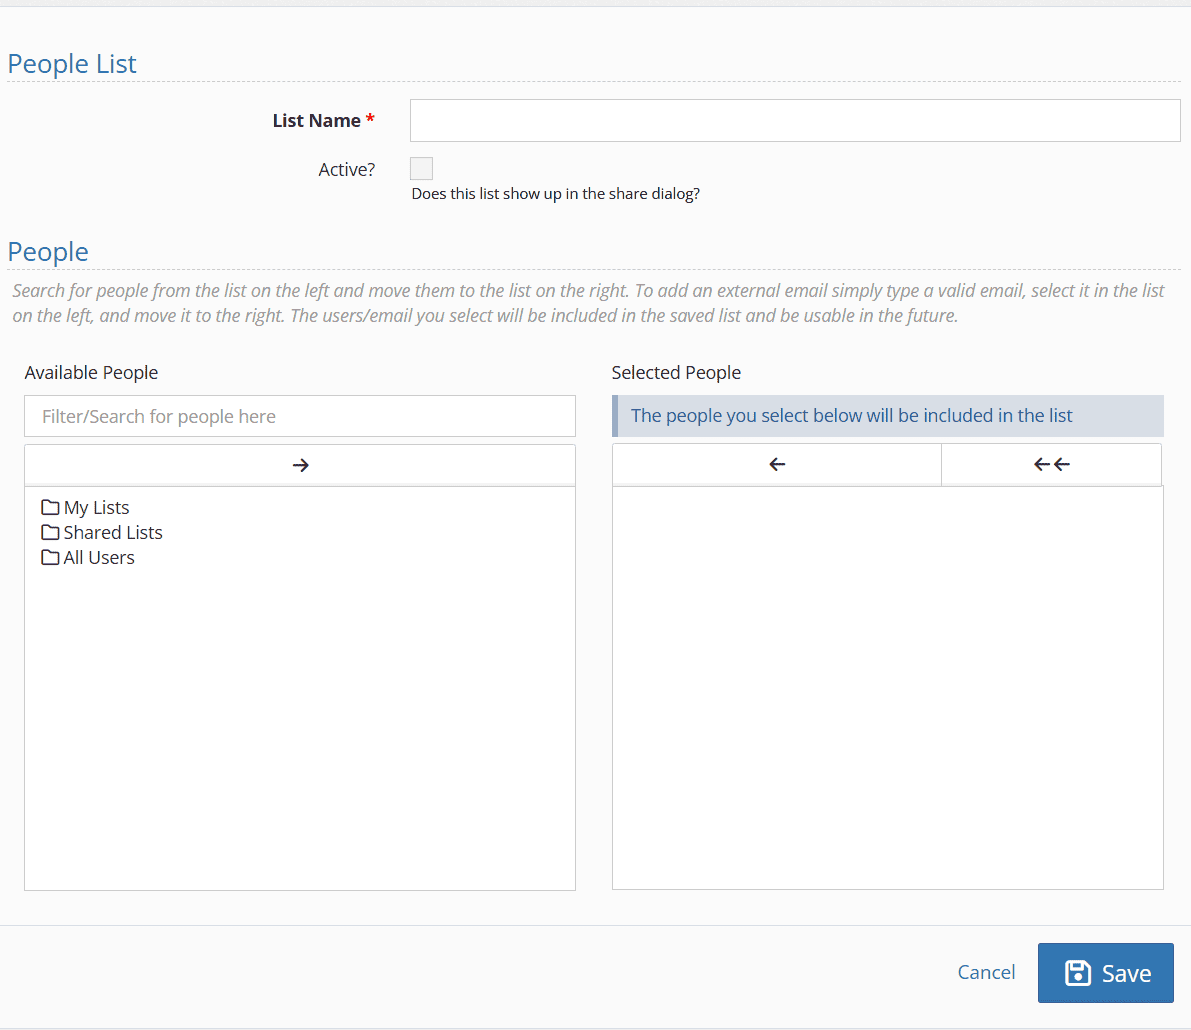
Updating or creating a new People List
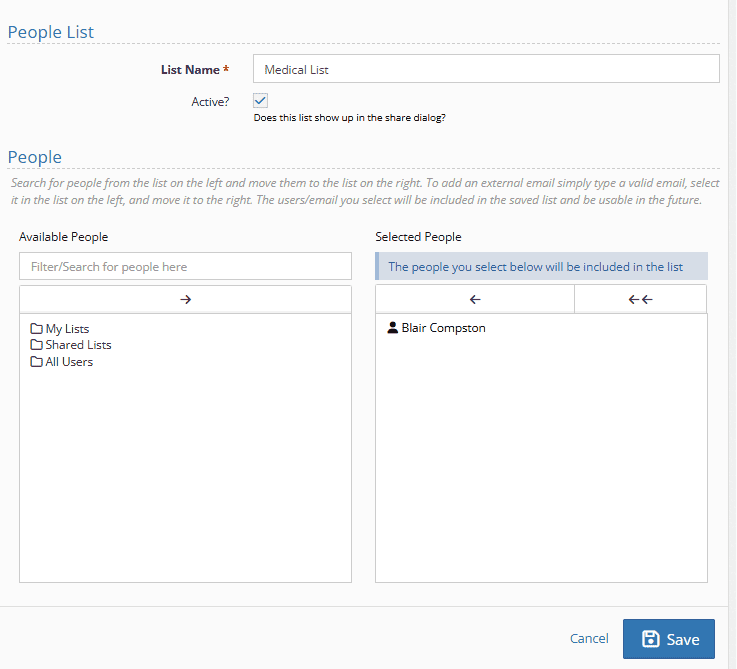
Once the “Shared People List” has been selected from the Picklist admin, you are able to either update previously made lists OR create a new list for your team.
Editing a previously created list
Step 1: To the left of the list you would like to edit, select the edit button

Step 2: Update any necessary information, including:
- List title
- Whether or not the list should be active or not (checkbox)
- Update who appears within this list
Adding people to a previously created list:
If you need to add people to this particular list name, you can either search for their name using the search bar OR open the “all users” folder and find their name within.

Once the name has been found, select the person and choose the “move selected” arrow.
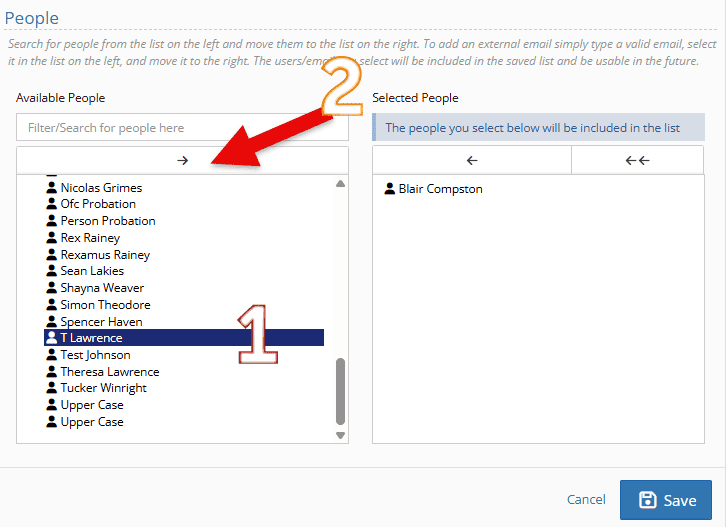
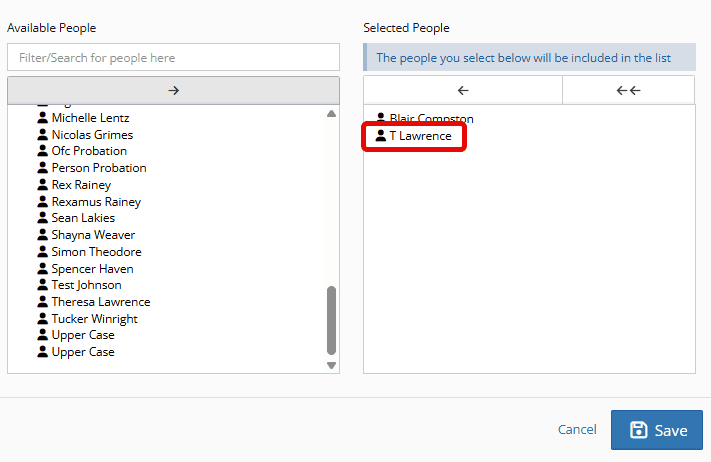
Your user has now been added to the list. Click save if ready.
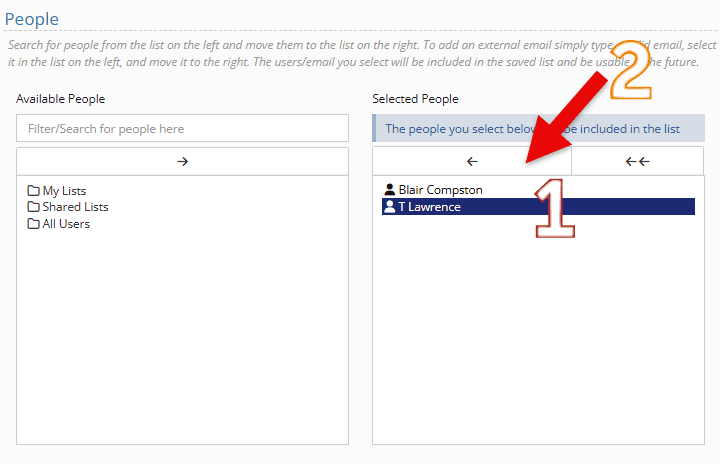
To remove a person from this list, select the name on the right-hand side and choose “remove selected”
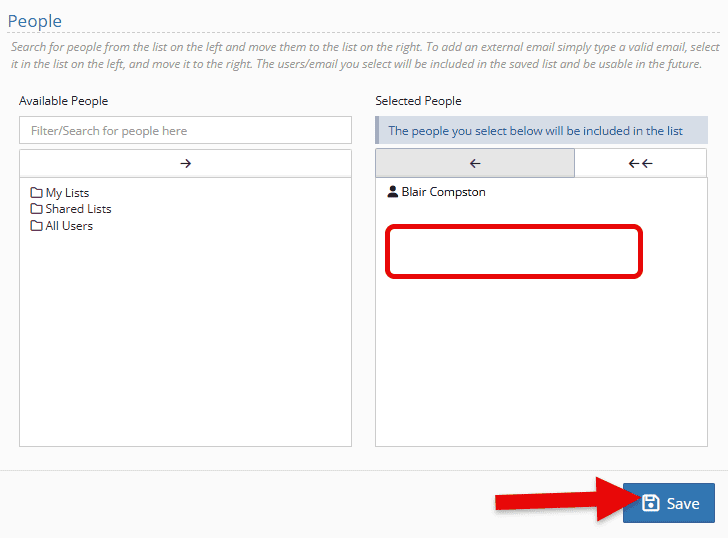
Once completed, you will see the person has been removed, and you can click “save.”
Creating a new Shared People List
To make a new list, once you have found Shared People List in the pick list admin, select the green “create a new shared people list”

Fill in the necessary information shown below using the same steps shared above to add to the list.
Incident Addition – Intervention Methods
Incidents now include an option for intervention methods.
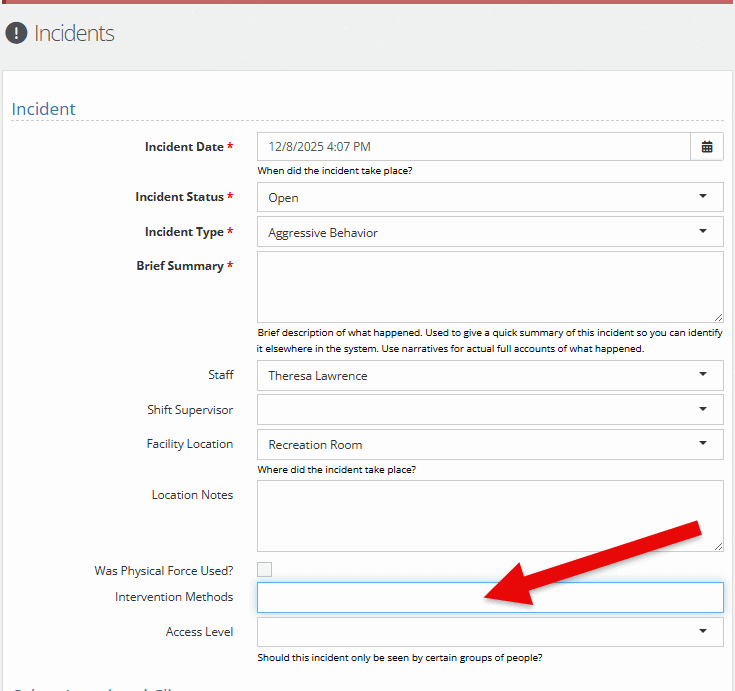
Administrators may add in intervention methods using the picklist editor.
Intervention methods could include restraints (hard or soft), isolation, physical restraint, etc.
Widget Filtering – Gender
Under many of the client widgets on your dashboard, you can now filter by gender, allowing you to quickly view youth broken out by male or female on your dashboard.
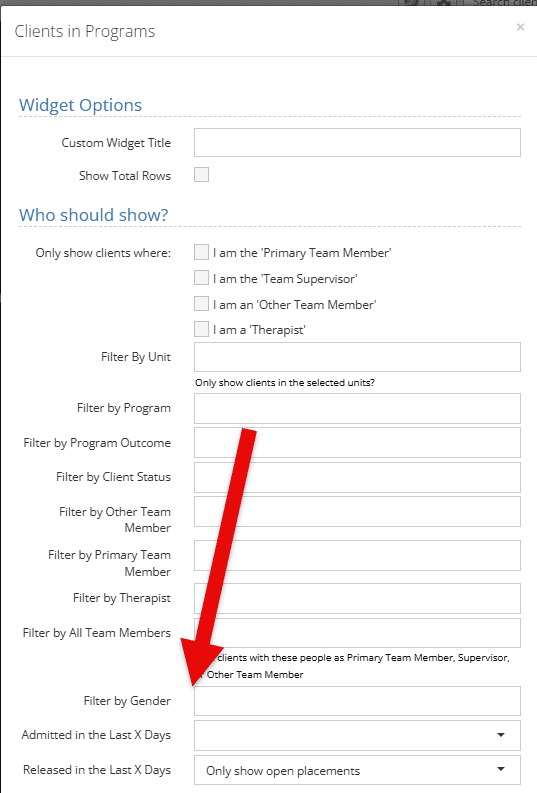
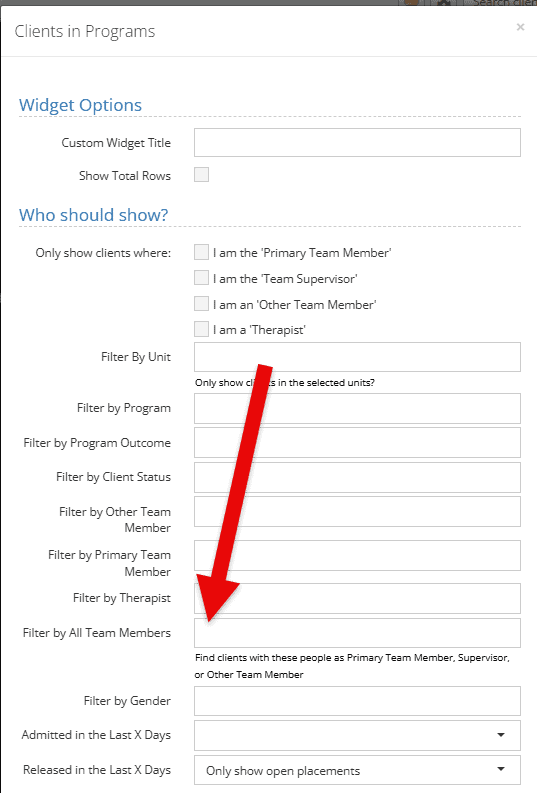
Widget Filtering – By All Team Members
Under many of the widgets available to dashboards, you can now filter clients by choosing a person’s name who is on any of the team members of a client including the primary team member, supervisor, or other team member. This can be helpful for caseworkers who may be assigned as a primary caseworker, but as an Other Caseworker on another caseworkers client (Primary Caseworker or Other Caseworker).
Widget Filtering – Clients in Facility Widget
The “clients in facility widget” has been updated to not only show empty rooms and filtering by Unit, but ALSO the following filters:
- Filter by program
- Filter by Client Status
- Filter Court Case Status
- Filter by Therapist
- Filter by all Team Members
- Filter by Gender
- Filter by Tags
This can allow for quick visibility and sorting of different youth right on your dashboard.

Providing Feedback
Your experience helps shape YouthCenter. Whether you’re a caseworker, JPO, or administrator, your ideas guide our growth. Please feel free to share your feedback or new ideas through our form (linked here)—we look over all submissions every two weeks.