Our April release brings significant enhancements, including the ability to schedule visitations without a facility placement, a new centralized facility visitation application, improved visitation screens, virtual visitation links, and various program updates aimed at streamlining operations and enhancing user experience. This release is expected to go live on 4/28/2024 at 11 PM EST (Click here to see the time in your timezone).
Visitation Updates
Visitations have improved significantly. The new visitation updates aim to further support residential, detention, and day treatment needs.
Visitations without a facility placement
One of the major requests from our day treatment and school programs was the ability to schedule visitations without having a facility placement. With this release, facility placements are not required to schedule a visitation! This automatically applies to all visitation programs. Schedule away!
New Facility Visitation Application
A new application has been developed to assist in managing visitations in a centralized location. You can find the new application under the facility manager menu.
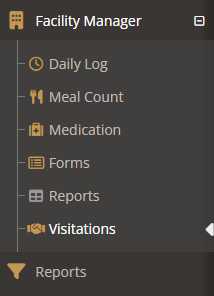
What’s included in the facility visitation application?
- Schedule visitations for any client from the application
- See upcoming visitations for all clients
- Search upcoming visitations by client or visitor name
- See cancelled visitations
Visitation screen updates
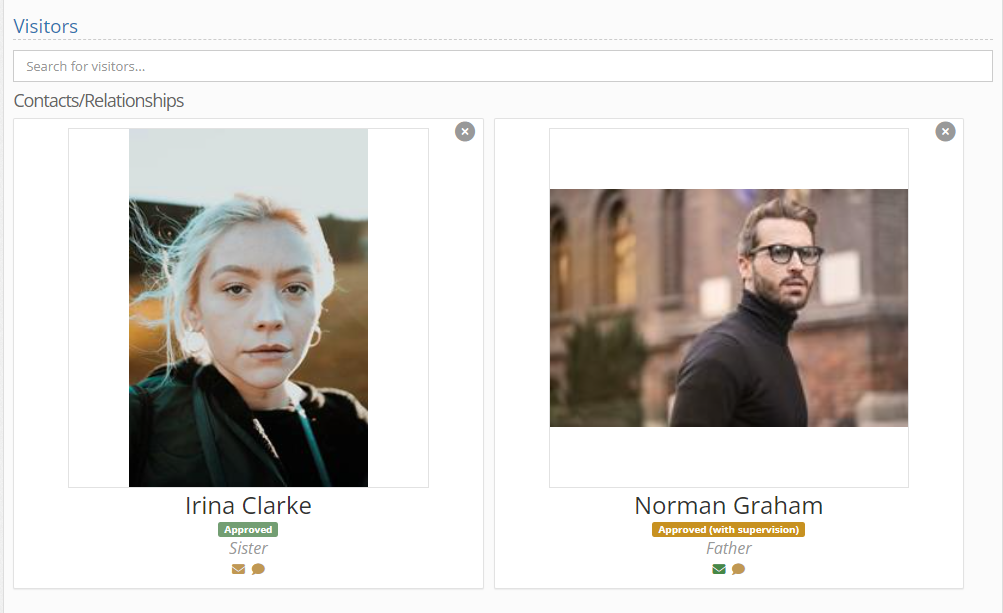
The individual visitation screen has been updated to make it easier to see visitors. A larger view of the visitor's profile image has been added.
Virtual Visitation Links
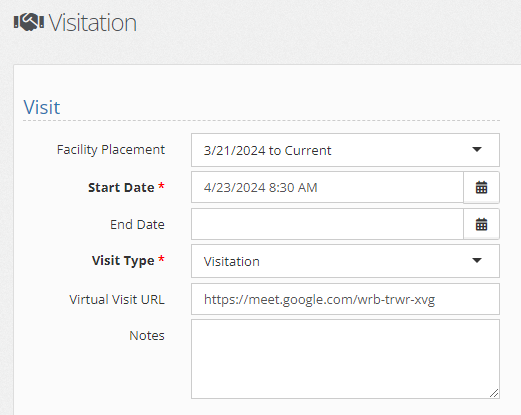
If your facility allows virtual visitation, you can now put the link in the visitation so you can quickly open up the meeting when it’s time to start. The link is free-form and can support any meeting host.
Reminder - Text Message Reminders for Visitations
If you have text messaging enabled for your application, visitors with notifications turned on will receive a notification 24 hours in advance of the appointment. If you don’t have text messaging yet, reach out to our support team or sales team and we can assist you in turning them on!
Program updates
To minimize the number of clicks required to adjust balances, you can now quickly adjust a client’s balance via a button on your dashboard.

Show program balances in the client header
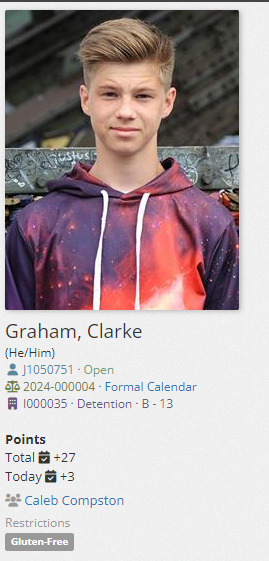
Some facilities that have point or incentive programs have requested the ability to see balances at a glance. We’ve added the option to put the transaction balance as well as the daily gain or loss to the client header.
Predefined transactions
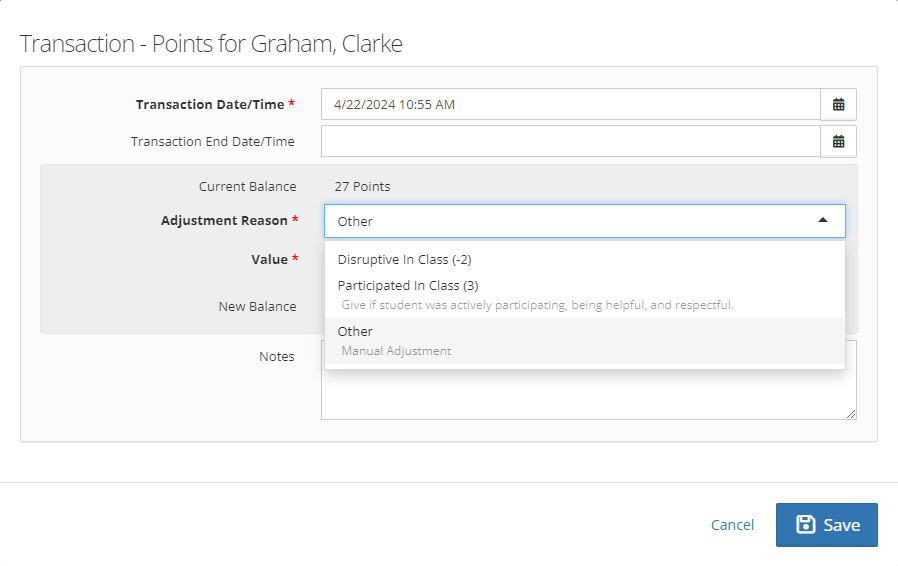
If your program has default adjustments for behavior or work, you can now create predefined actions. For example, if disrupting class is -2 points, and being an active participant is +3 points, you can make it easy for all staff to quickly choose an option and keep your bonuses and penalties consistent.
To add a preset, open the picklist admin and search for Program Transaction Preset
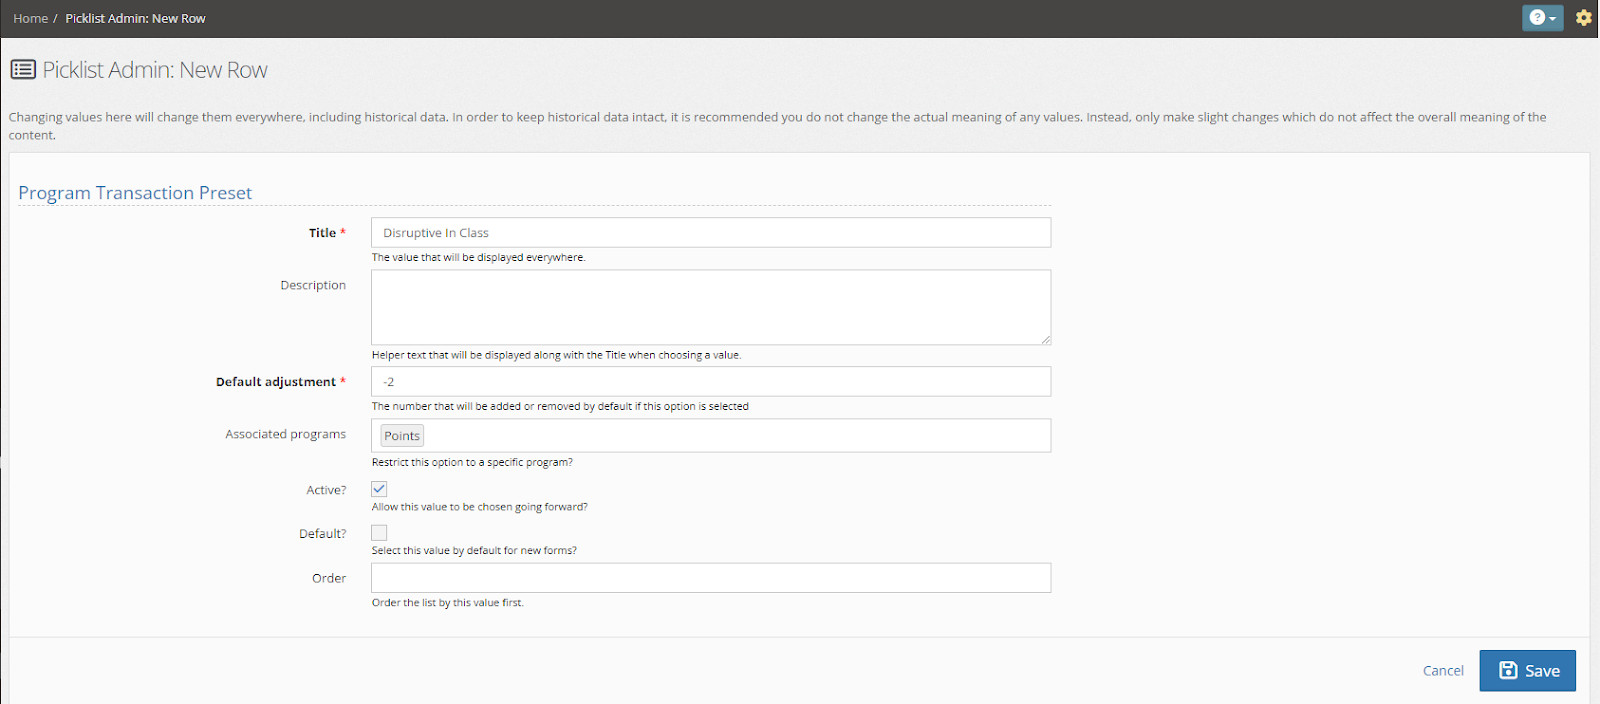
The title is what will show in the picklist. The description allows you to provide additional context in the pick list. The default adjustment can be either positive or negative and allows for quick, consistent balance adjustments. If you wish to have multiple different preset actions for different programs, you can select which programs this preset applies to in the associated programs section. Don’t forget to press save, before adding another preset.
Require transactions to be approved
If you would like to add a double-check on changes to program balances, you can require transactions to be approved. To turn on transaction approvals for a program, first open the picklist admin, and search for programs.
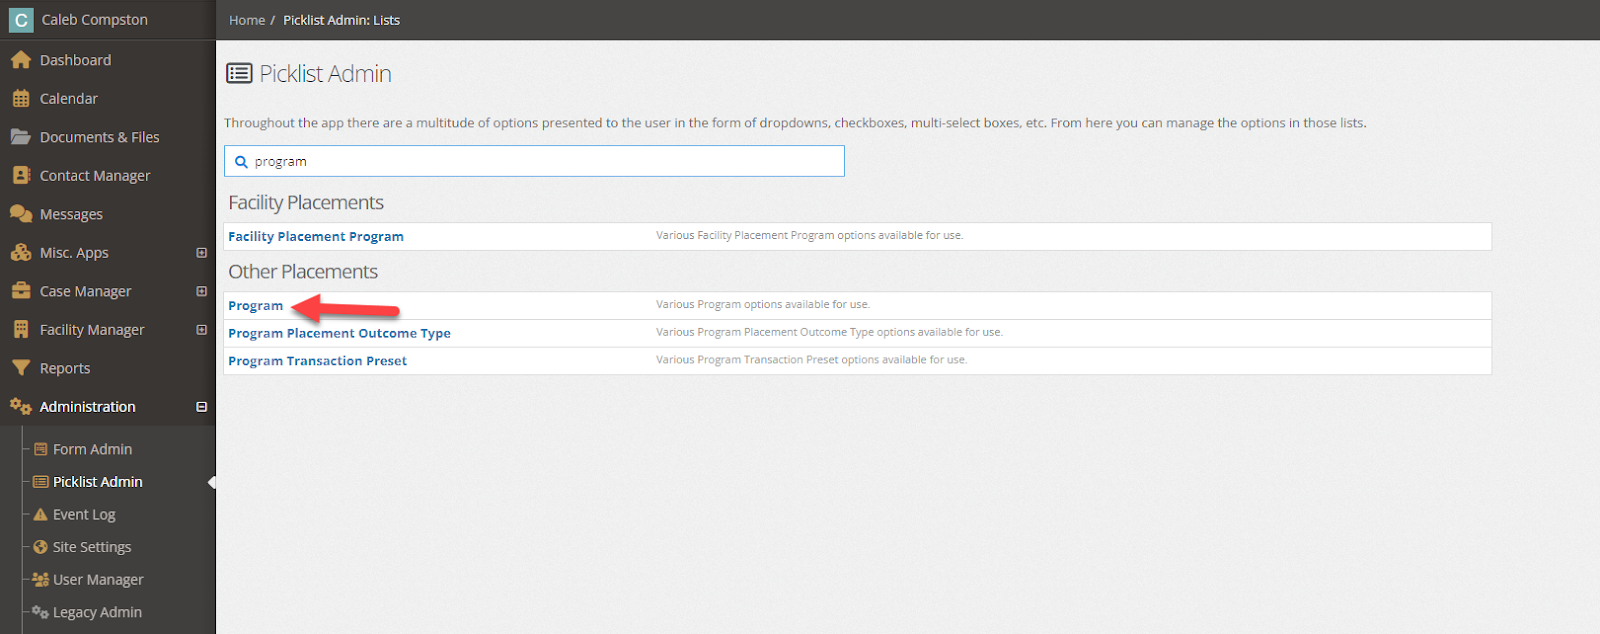
Find the program you wish to require transaction approval on, and click the edit button:

Find the Transactions require sign-off check box and turn it to true:

Save your changes. The program will now require approval of any future transactions. You will also want to grant at least one user group the ability to approve transactions. To do so, open the User Manager under administration. Once open select the permissions tab and search for the transaction.
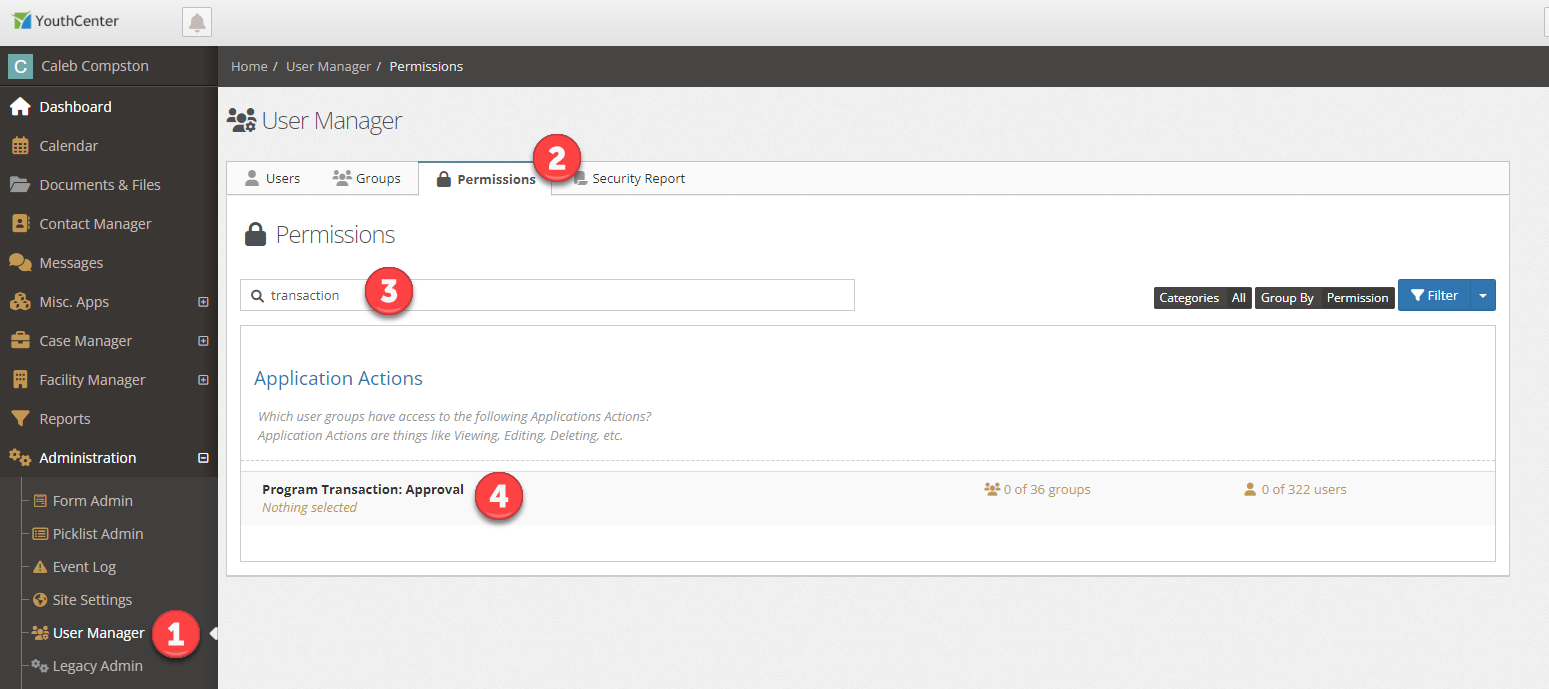
Select the Program Transaction: Approval permission, and add whatever groups you wish to be able to approve transactions. Finally, press save.
To see pending transactions, add a to-do list widget to your dashboard, or select the notification bell at the top and select to-do.
Multiple home counties
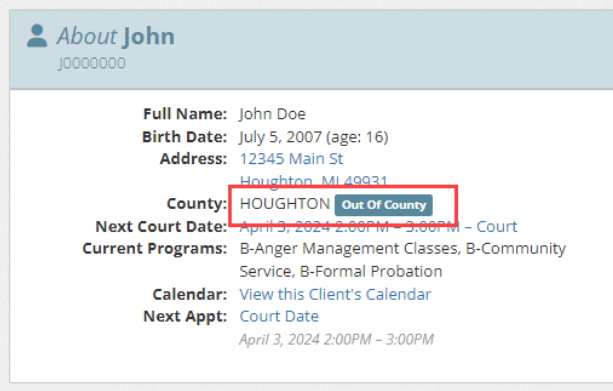
If you serve multiple counties, you can turn off the out-of-county flag that appears in the About section of a client summary. Simply open the County picklist in Picklist Admin and turn off your default county.
Save default options for activity log
You can now adjust the default objects and duration of the activity log filters. To adjust the default activity log, simply select the object types and duration you want to see and then press the down button next to the filter, and press Filter & Save as Default.

Speed improvements
Behind the scenes, our developers have been working on increasing YouthCenter’s speed. This release will see improvements to the speed of the activity log, search, and when you first access the site.
Add Therapist to Widgets
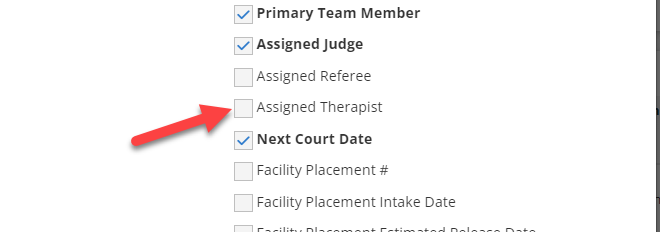
Therapists can now be added to many of your dashboard widgets. To add the therapists, select the gear icon on the widget you want to customize.

Then toggle the assigned therpaist and press save:
Filter Widgets by Care Provider
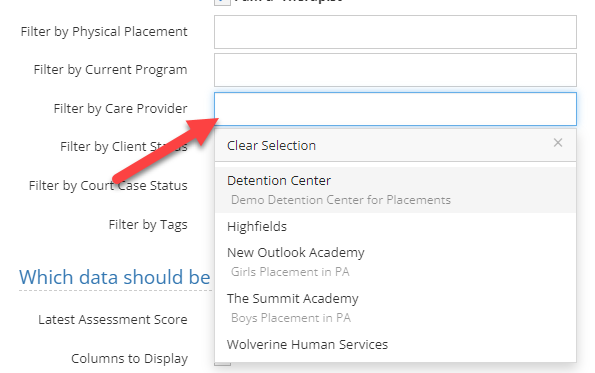
If you wish to see only clients being cared for by specific care providers you can now adjust several widgets to filter by that provider. To add a filter for Care providers, select the gear icon on the widget you want to customize.

Then either type the name of the provider or select it from the drop-down and press save.
Providing Feedback
YouthCenter continues to be a solution built for and directed by your needs as caseworkers, JPOs, administrators, and more. Your feedback is very valuable. If you have any thoughts or ideas on how we can improve the software, please reach out to us via our suggestion form. New ideas are reviewed on a bi-weekly basis.