The June 2022 YouthCenter release includes a major update that allows people who are involved with youth (parents, guardians, attorneys, therapists, etc) to be invited to fill out forms without being a user of YouthCenter. Along with the form update, we’ve made the next court date display function with the calendar, added the ability to edit the detention intake checklist for our detention users, added some widgets for administrators, and added reporting for missing data.
Custom Form Invitations
This new feature allows you to designate forms to be filled by individuals outside of YouthCenter including parents, guardians, attorneys, therapists, and even the client themselves. Anybody can be invited to fill out a form associated with a youth.
There are 5 steps to setting up a form that can be filled out by invitation:
- Setup the form to allow invitations
- Build the form as you normally would
- Set security on the form
- Set the form to Active
- Invite a person to fill out the form
Once a form has been filled out, a user with access to that form may see the information filled out by the invitee. If an invitee hasn't filled out the form, you may also re-send the invitation or cancel the invitation if needed.
1. Setup the form to allow invitations
To enable forms to be filled by invitation, an administrator will need to create a new form or modify an existing form to allow invitations.
After accessing the administrative interface of YouthCenter, select Administration under the tools heading, then select Forms and Reports.
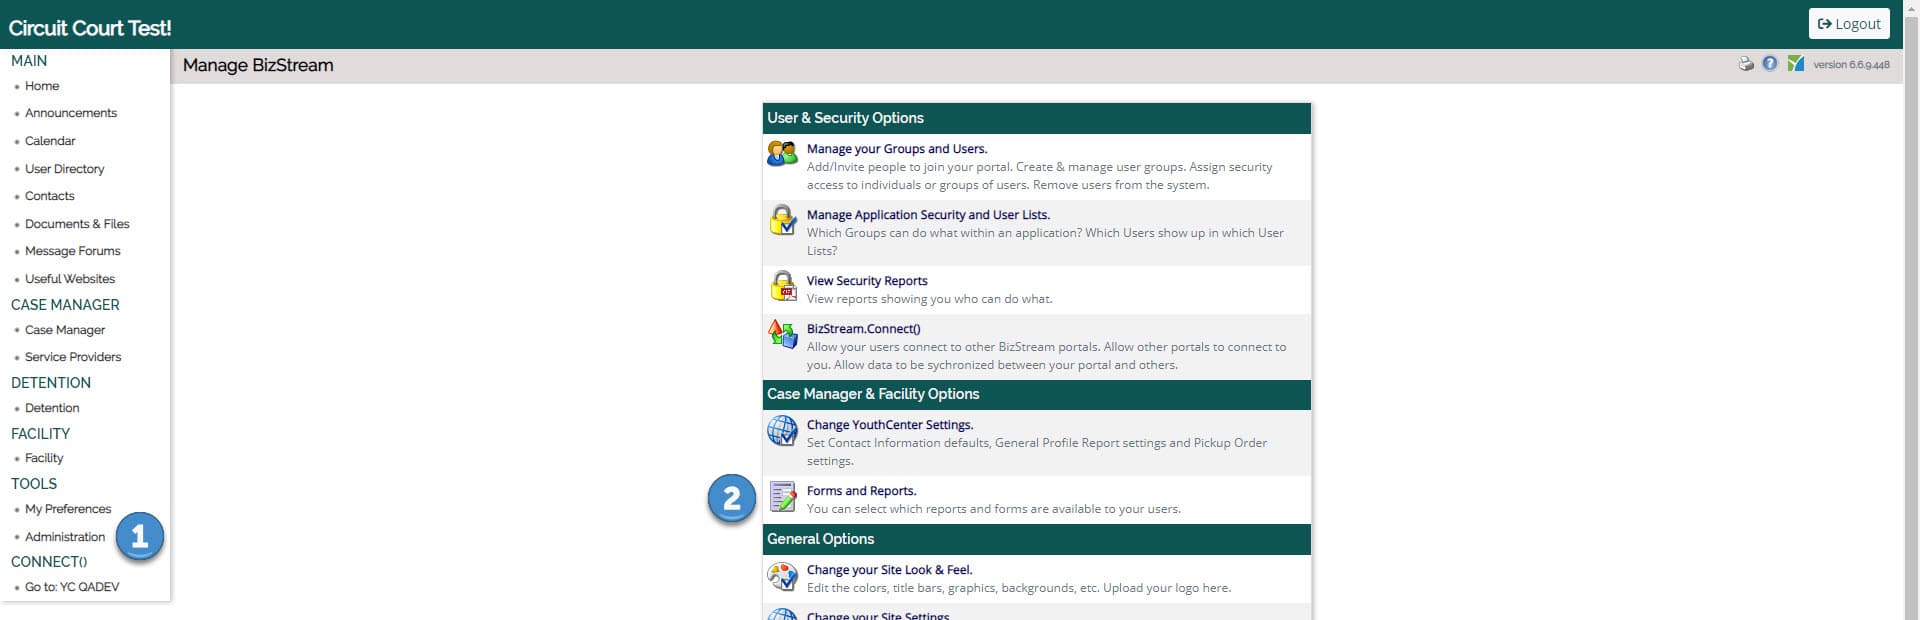
From the listing, you will either need to create a new form or modify an existing one. In our example below, we are modifying an existing form that would appear under the youth’s General Profile tab.
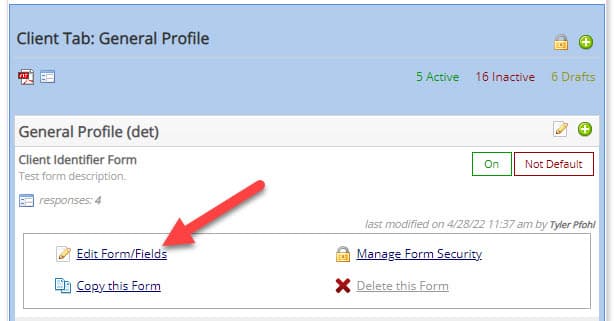
Once you are in the form editor, you will see a new section below the Report Data Source option. The first option is Allow Invitations, by default all existing forms are set to No. Toggling this to yes will allow the form to generate invitations to external users.
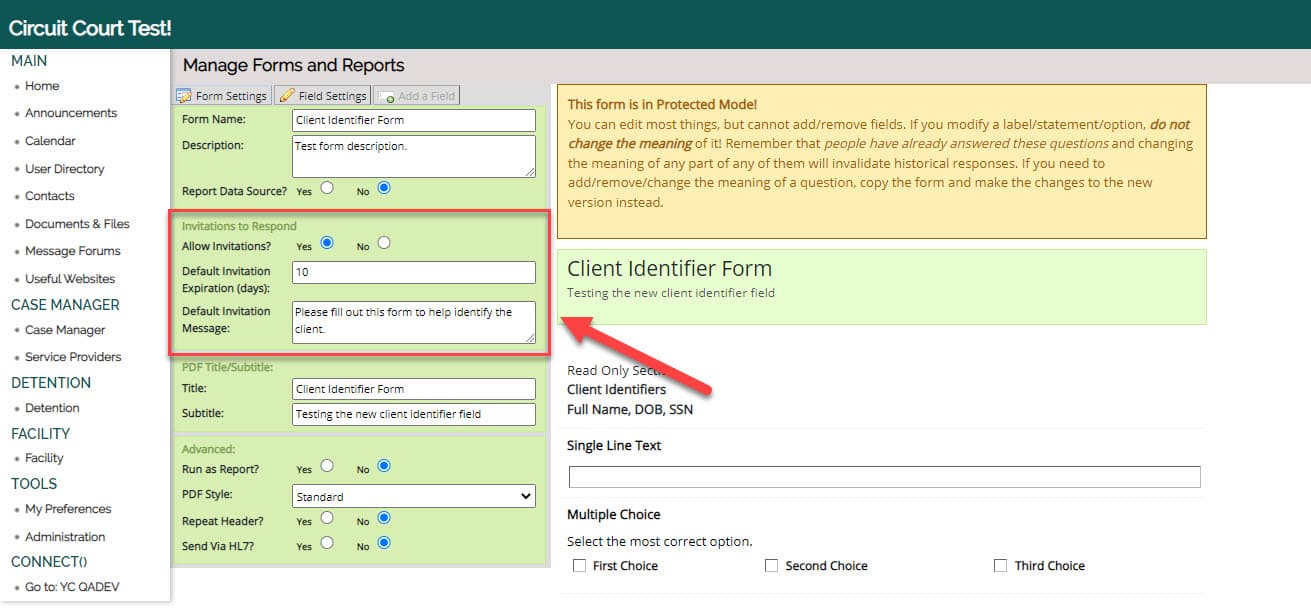
The second option is Default Invitation Expiration (days). When an invitation is generated, the expiration date will automatically be set to the current date plus the number of days you designate here. A YouthCenter user sending out an invitation may still modify the date if desired when sending out an invitation. Once an invitation has expired, it will need to be resent if the form still needs to be filled out.
The final new input is the default invitation message. Whatever text is placed here is what an external guest will see in the email invitation that is sent to them. A YouthCenter user sending an invitation may still customize the message when they send the invitation to the form.
Don't forget to save the form to keep your settings.
2. Build the form as you normally would
If you are setting up a new form, you will need to add fields using the “Add a Field” tab and dragging the appropriate fields to the form.
Once you’ve finished creating or editing your form, be sure to save the form.
3. Set security on the form
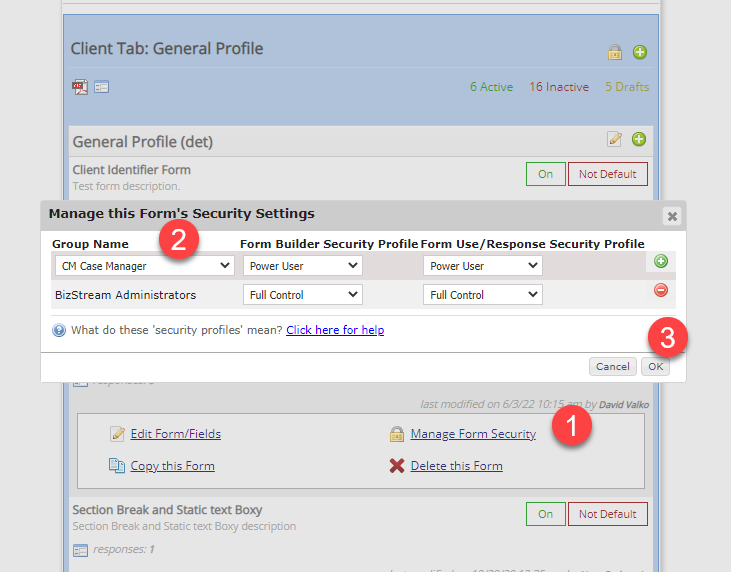
If you are modifying an existing form, the security from the original form will cary through to the modified form, however, if you are creating a new form you will need to set security permissions on the form to allow editing or filling out/invititing guests to the form.
From the form listing, select “Manage Form Security” which will bring up the form security settings. From the drop downs, select the user group you wish to grant access to the form. A common setting to use for user groups is “Power User”. Click OK to save the security settings.
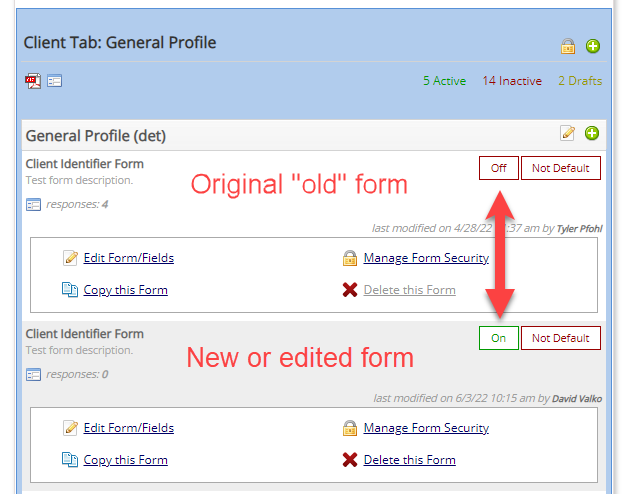
4. Set the form to Active
If you are creating a new form, you will need to be sure to make the newly created form to active. If you are editing an existing form, you will need to turn off the previous version and turn on the newly edited form as shown below.
5. Invite a person to fill out the form
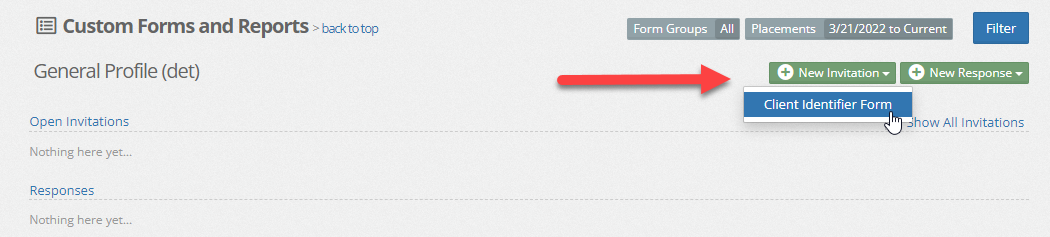
Once a form has been designated as fillable, the form view looks slightly different. To send a form to a guest to fill out, select the + New Invitation button to the top right of the form. If you have multiple external forms that can be filled out a dropdown will appear and allow you to select the form you want.
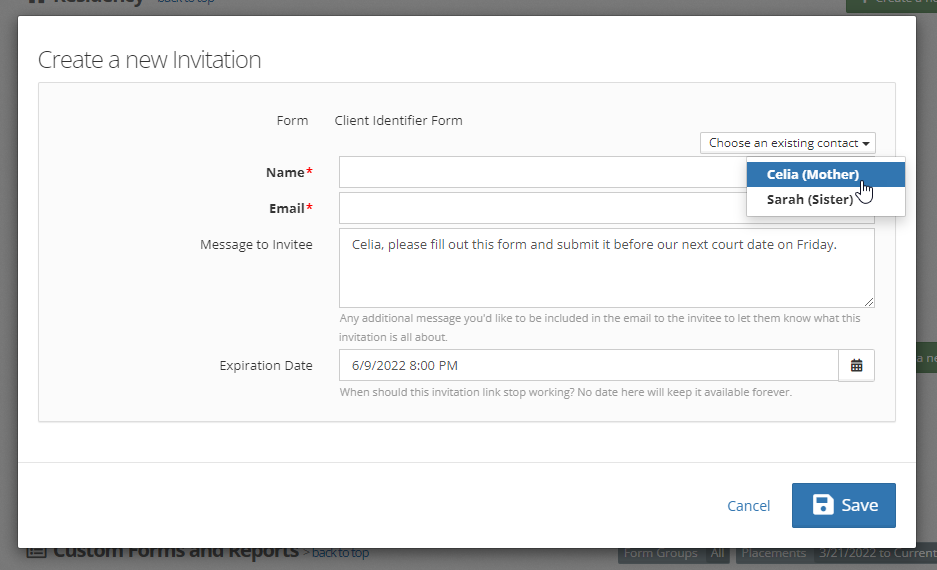
Once you have selected the form, the external invite window will appear.
If the guest you are inviting is already part of the client's contacts, you can simply click Choose an existing contact and that contact's name and email (if available) will populate. Otherwise, enter the name and email of the guest you wish to be able to fill out the form. Optionally, customize the message and expiration date and press Save.
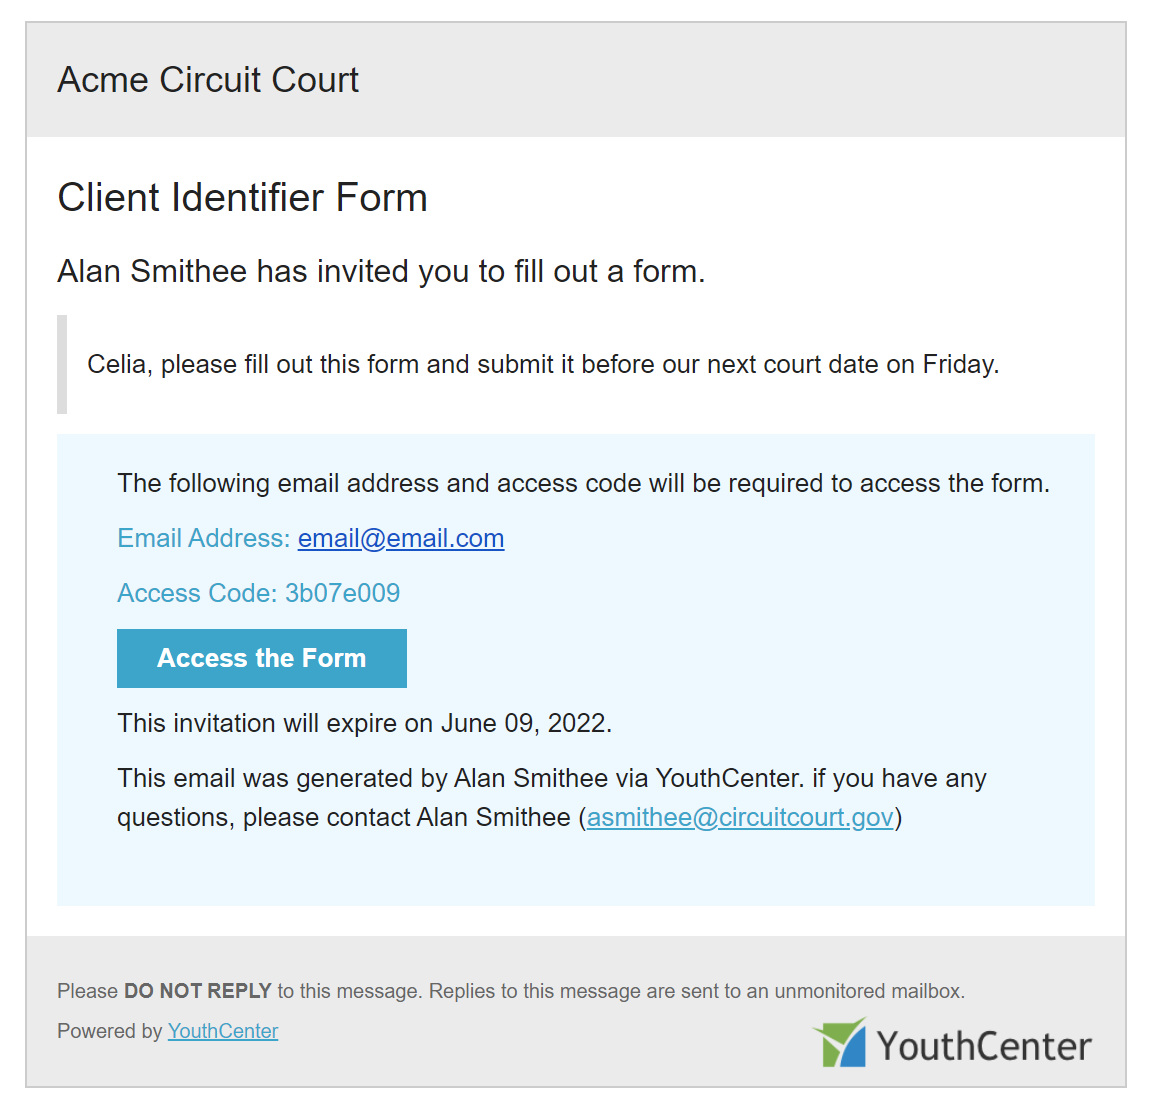
The invitation is sent via email to the guest with information with a URL, their auto-generated username, and password for the invitation. Each invitation will generate an audit log entry for tracking purposes.
Resending, Changing the email, and disabling an invitation
Sometimes, things get lost, emails get mistyped, or situations change. The sent invite dropdown can handle all three of those scenarios. For any pending invitation, you can click the carrot to the left of the invitation to make adjustments.
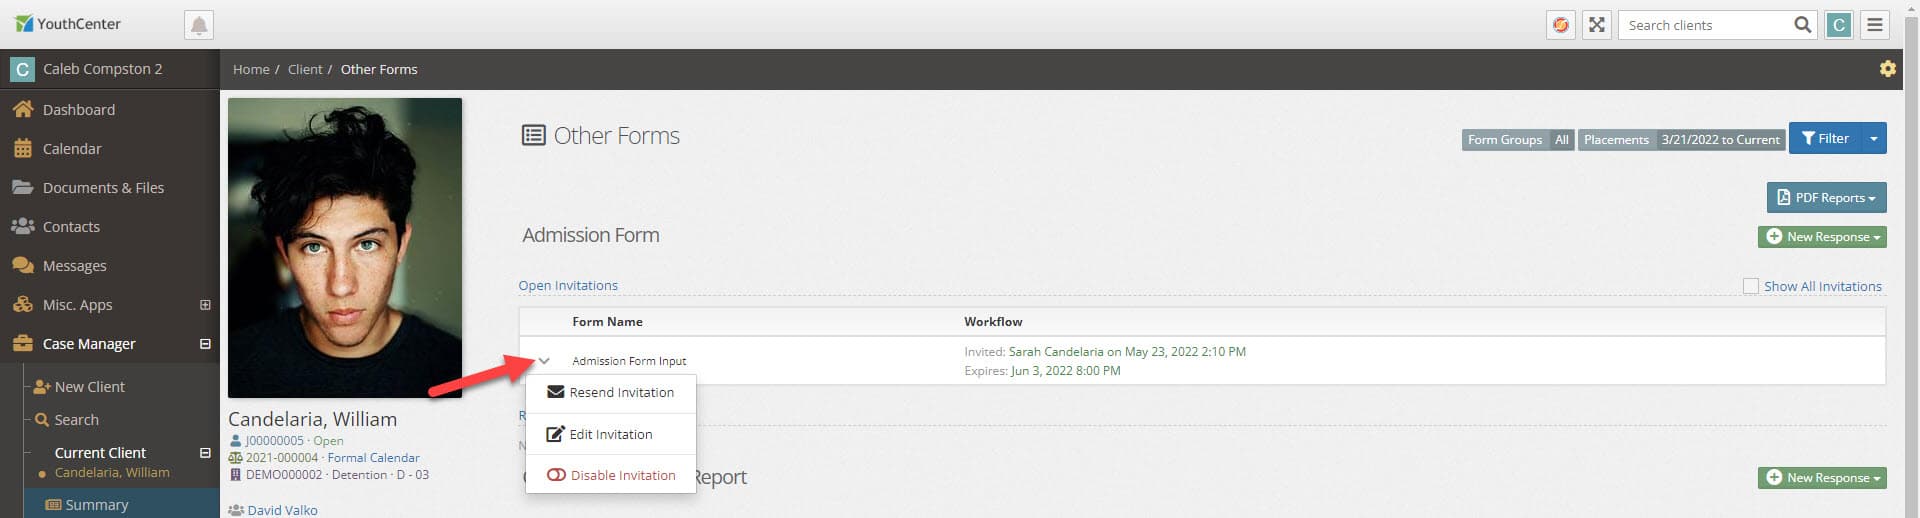 Resend Invitation
 simply sends the same email again.
Edit Invitation allows you to update any setting (Name, Email, Message, Expiration Date)
Disable Invitation will pause the ability for that guest to respond to that form (Other forms are unaffected.)
The Forms Look - In App
By default, you will see any forms that have been filled out and any open invitations.

You can also select the Show All Invitations checkbox to see all open, completed, and expired invitations for a form.
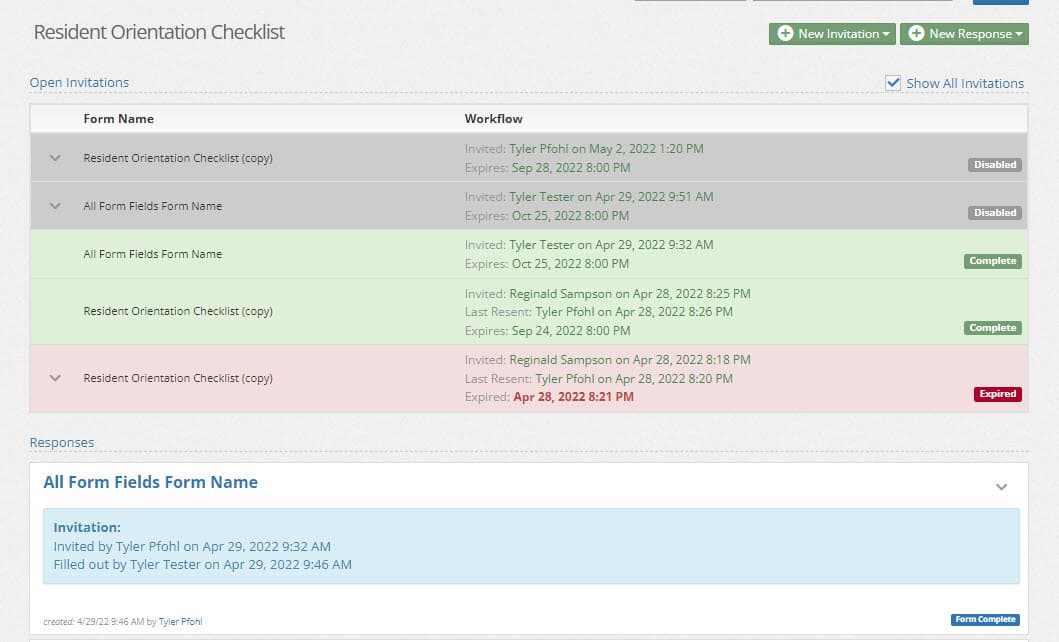
Form responses that have been filled by a guest will have details about the individual who invited the guest, and the guest who filled out the form. This information is placed in a blue box in the middle of the response list.
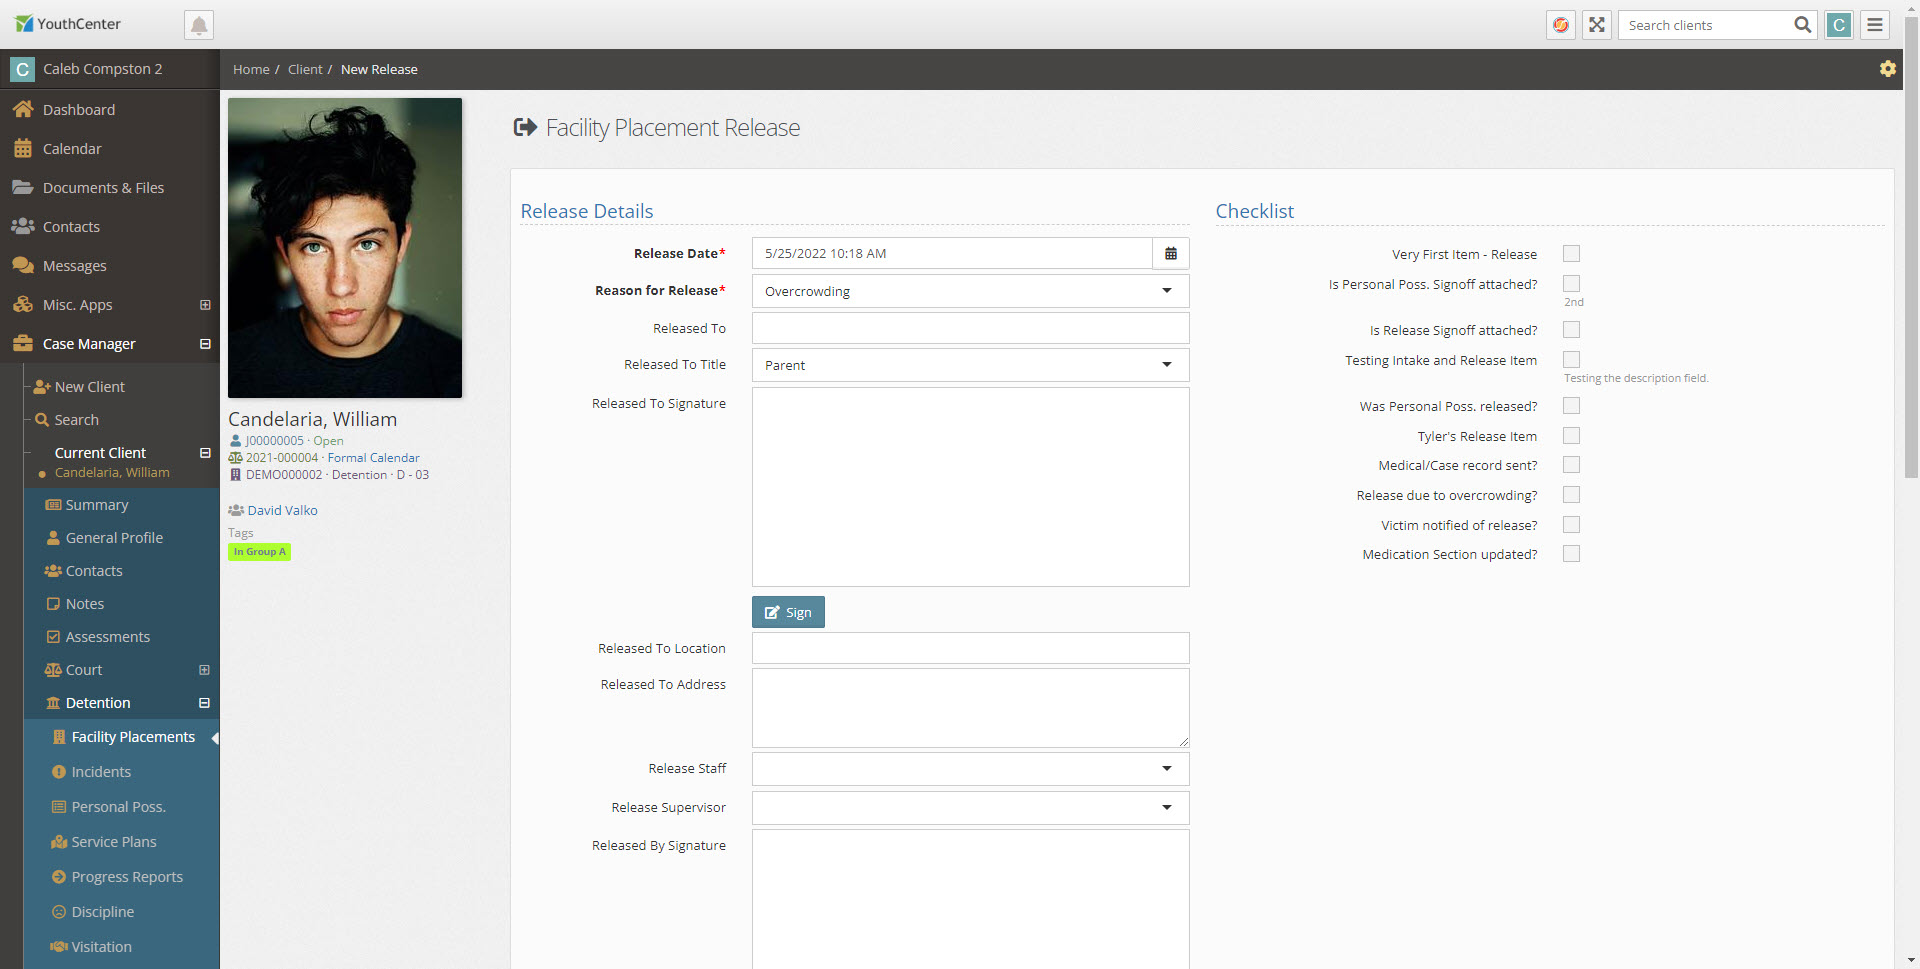
Editing the Facility Placement Checklists
In order to better serve detention facilities, we've added flexibility to modify the checklists for both intake and release from Facility Placements. You must be an administrator to add a checklist item to either or both forms.
Adding an item to a Facility Placement Checklist
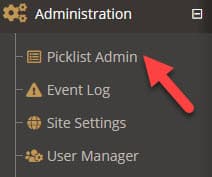
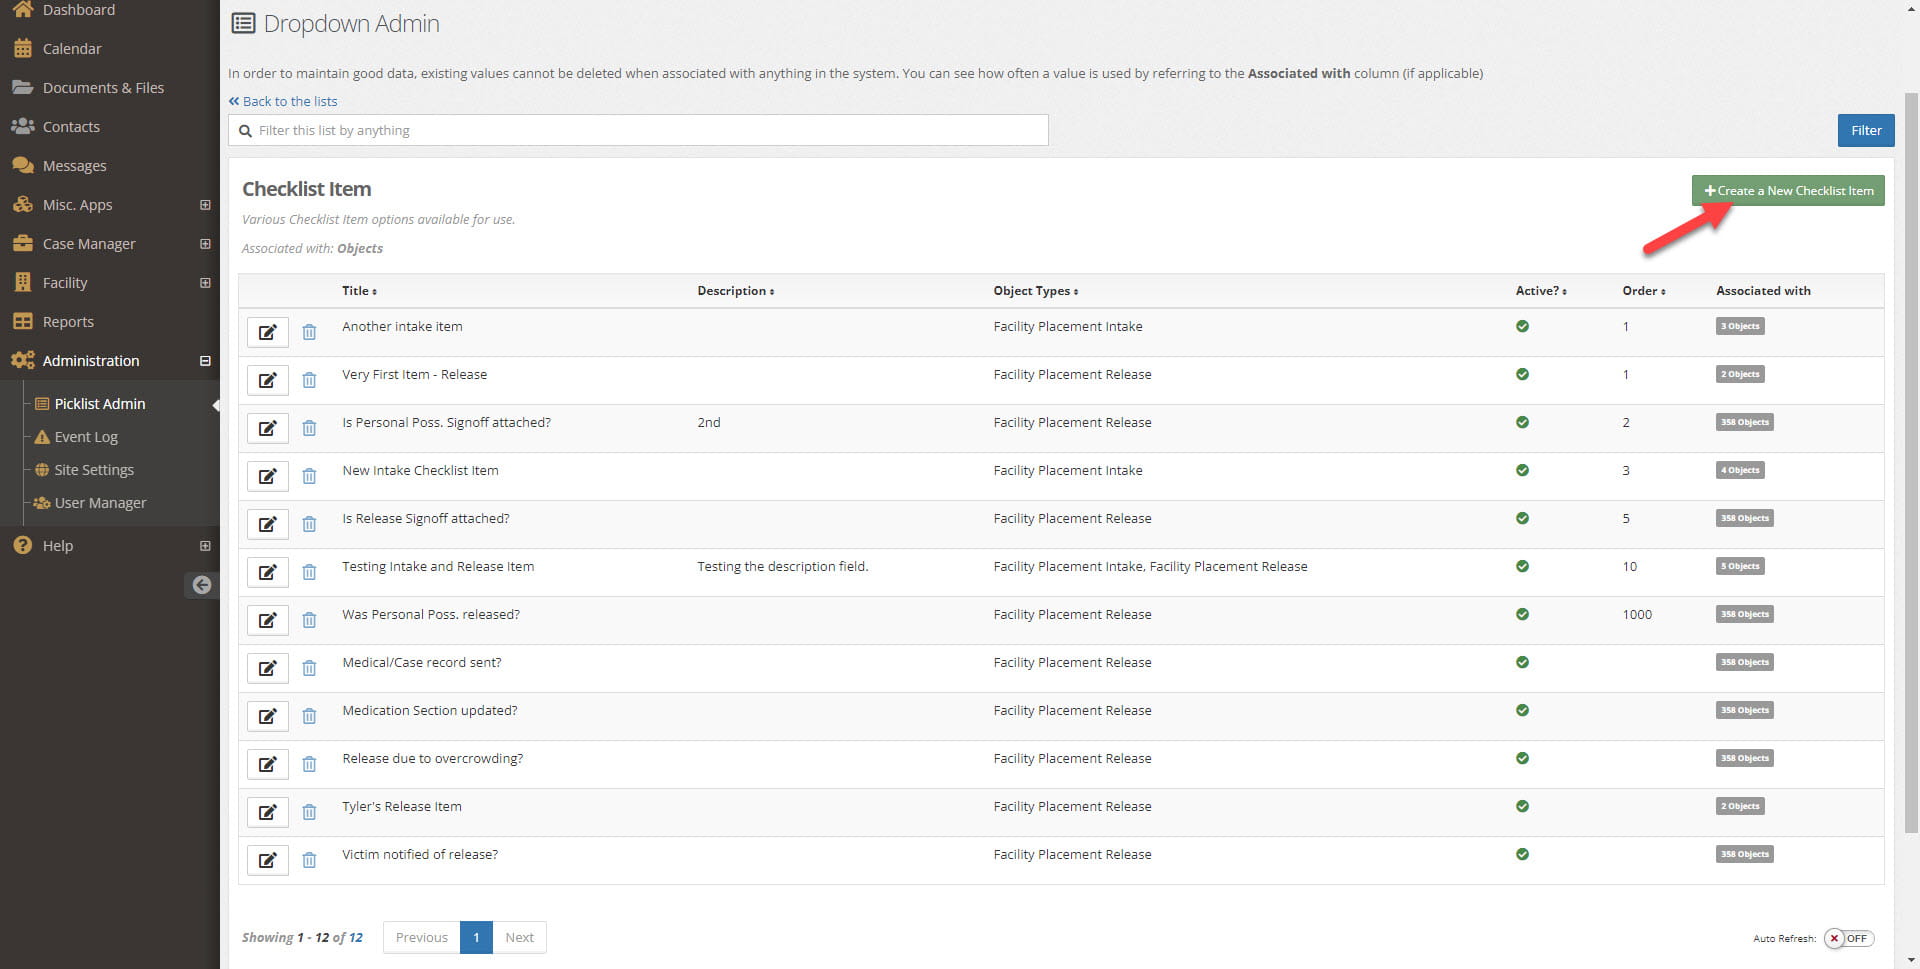
To add an item to the checklist, expand Administration from the left navigation and then select Picklist Admin.
Using the search feature, you can search for Checklist Item. As you may note, there are two different checklist items, one for the audit checklist, and one for general checklist objects. We'll want to select the latter.
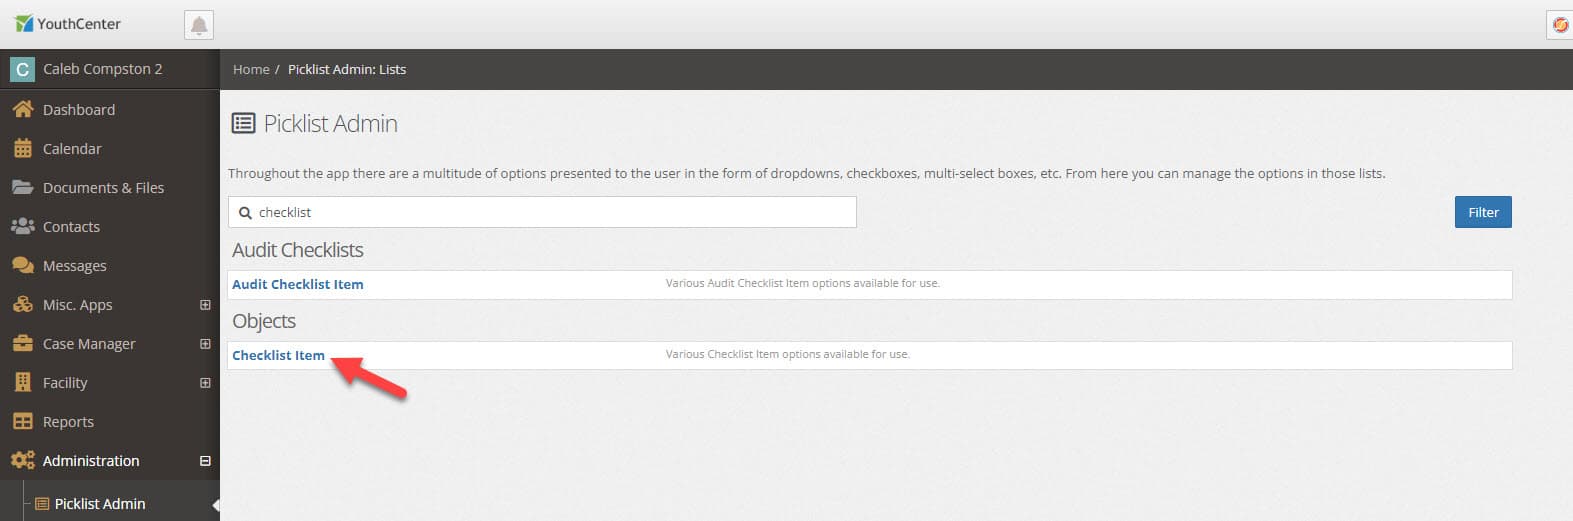
Once the Checklist Item option screen has loaded, press the green Create a New Checklist Item in the top right.
The
Title is shown next to the checkbox
The
Description is shown directly below the checkbox
The
Object Types tell the system which checklist(s) you wish to associate the item with.
The
Active checkbox dictates if the system will show the checklist item. This is useful if you aren't using a checkbox item anymore, but still want to be able to report on an item historically.
The
Order dictates where in the list it will show up. If you don't have any items with an order set, it will just sort them alphabetically.
Once you have filled out the new checklist item, simply press the blue Save button in the bottom right of the form. Your new checkbox will be added to the lists immediately.
Deleting a Checklist Item
To delete a checklist item, it can't have any associations. In other words, it can't have been checked any number of times when someone completed intake or release. An alternative to delete is to simply uncheck the Active checkbox in the item you don't want to show up. If you simply made a mistake and want to delete an item that hasn't been used yet, press the blue trashcan next to the item you wish to delete.
Reports to Show Missing Data
We’ve heard from administrators that the reporting in YouthCenter is great when you want to see what has happened, however, we’ve also had requests to use the reporting system to show when something hasn’t happened. For example, if your caseworkers are to enter a case note every day on Open clients, it’s been difficult to see if a day has been missed. We’ve updated data sources to include the ability to show when data is missing.
Reports now have data fields that include Calendar options that allow you to search or display specific information about dates:
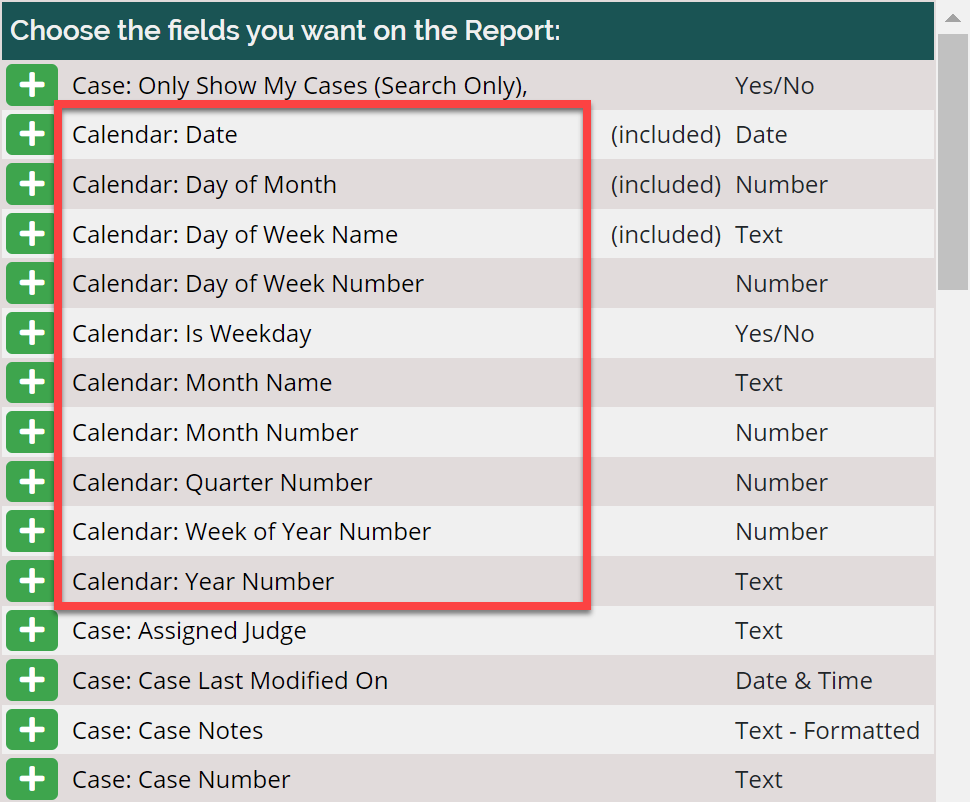
Adding those fields to a report will allow you to display the text and numerical version of the date. In the example below, we’ve built a report that shows what notes were missing during a week by client, showing the day of the week the note was missing.

In the above example, it looks like the caseworker missed adding notes on Wednesday and Friday of the week.
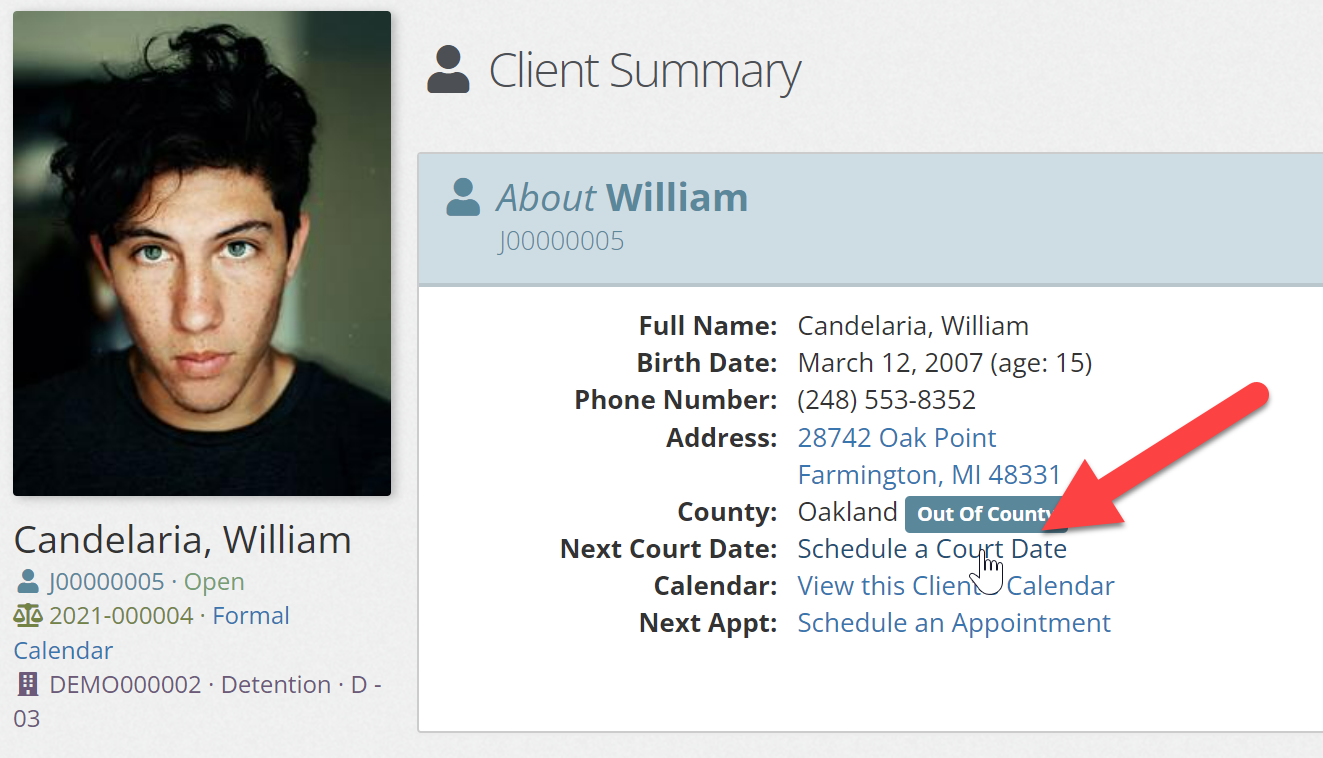
Next Court Date
The next court date for a youth is displayed on dashboard widgets and on the youth’s summary page. Previously it was not connected to the calendar of the youth. Now, rather than adding a date, YouthCenter will prompt you to Schedule a Court Date:
When you schedule a Court Date, you will be prompted to enter a calendar appointment for the youth. YouthCenter should default to the event type of “Court” as shown below. This event type will determine the next Court Date. You may also add the youth’s relationship as shown in the example below.

If the youth and other contacts have green icons on the Envelope and Message bubble, their email address and phone number have been entered and notification reminders will be sent to those email addresses and phone numbers (if you have the Text Message Addon in YouthCenter).
Once the appointment has been saved, you will see the calendar view with the appointment.
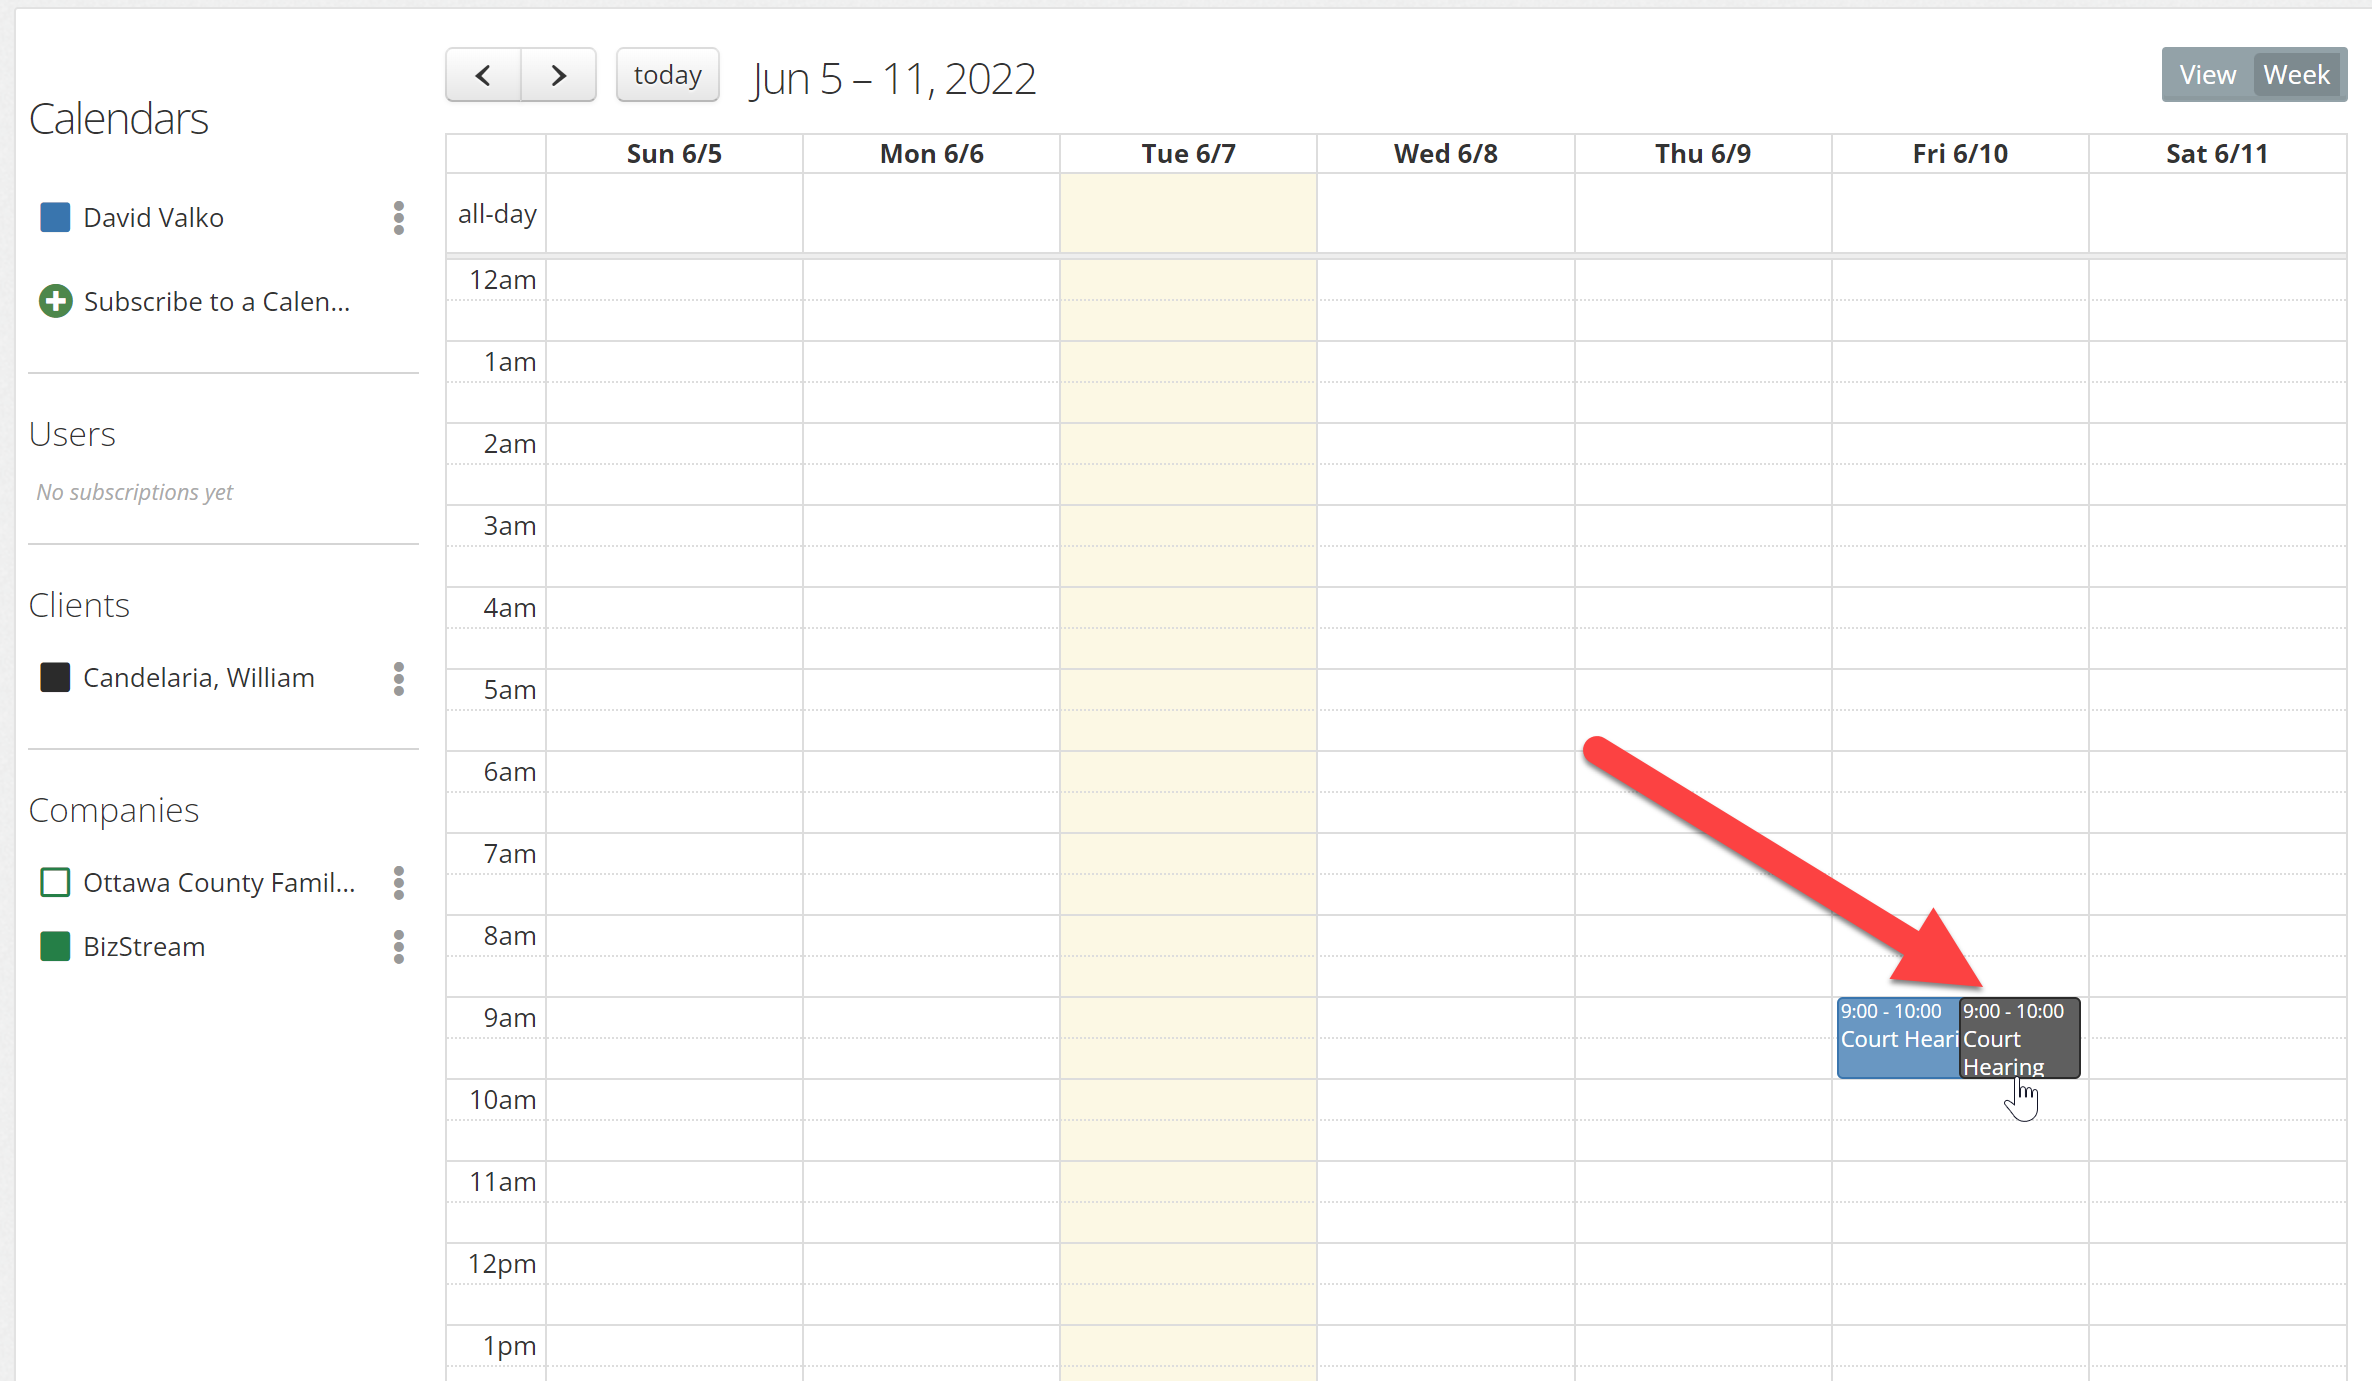
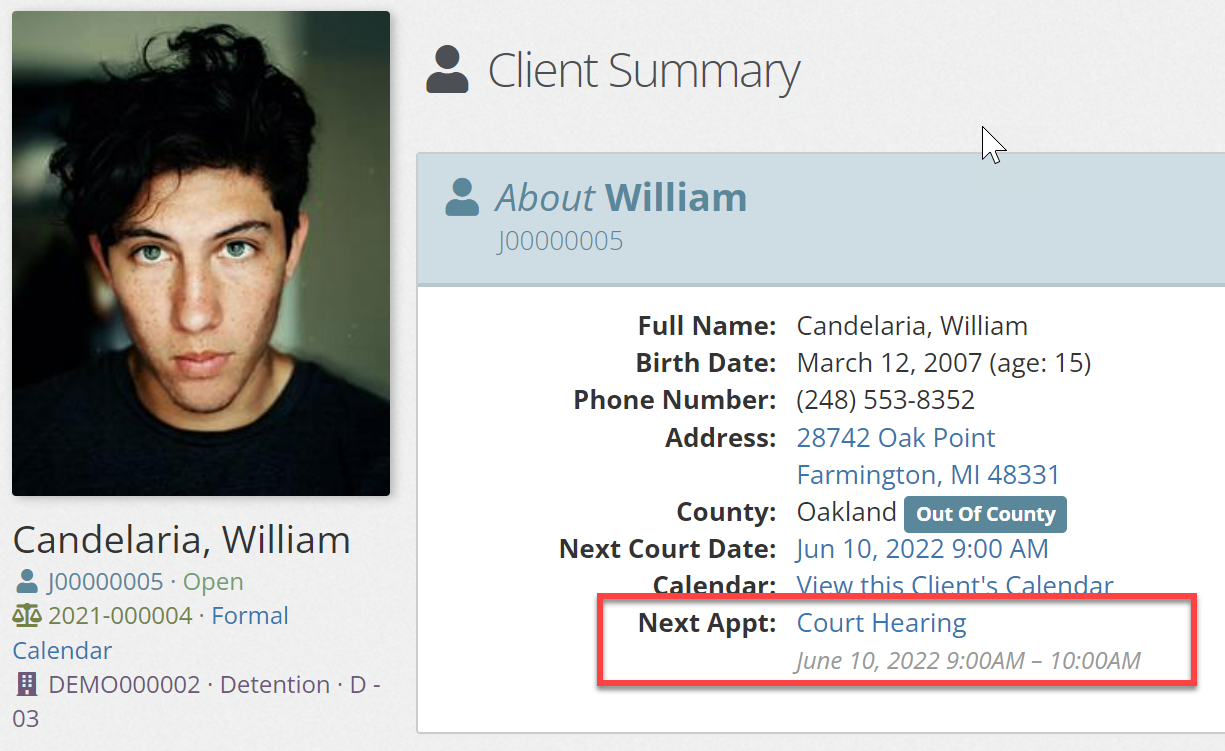
Going back to Case Managers > Summary for the client you will see the updated court date.
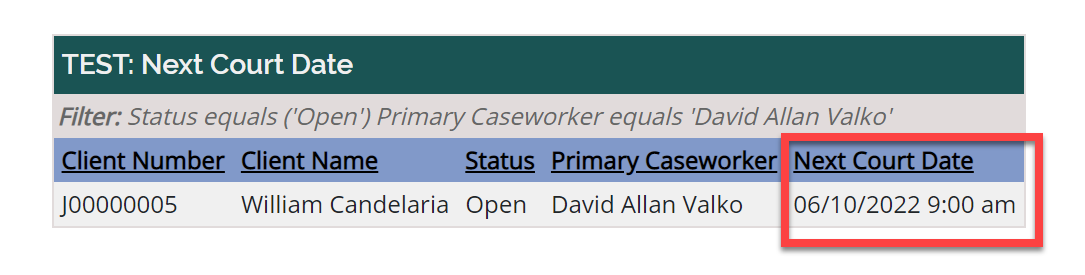
The same date will be shown on the dashboards and in reports

 Once the date has passed, the next appointment will be cleared and you will be prompted to “Schedule an Appointment”.
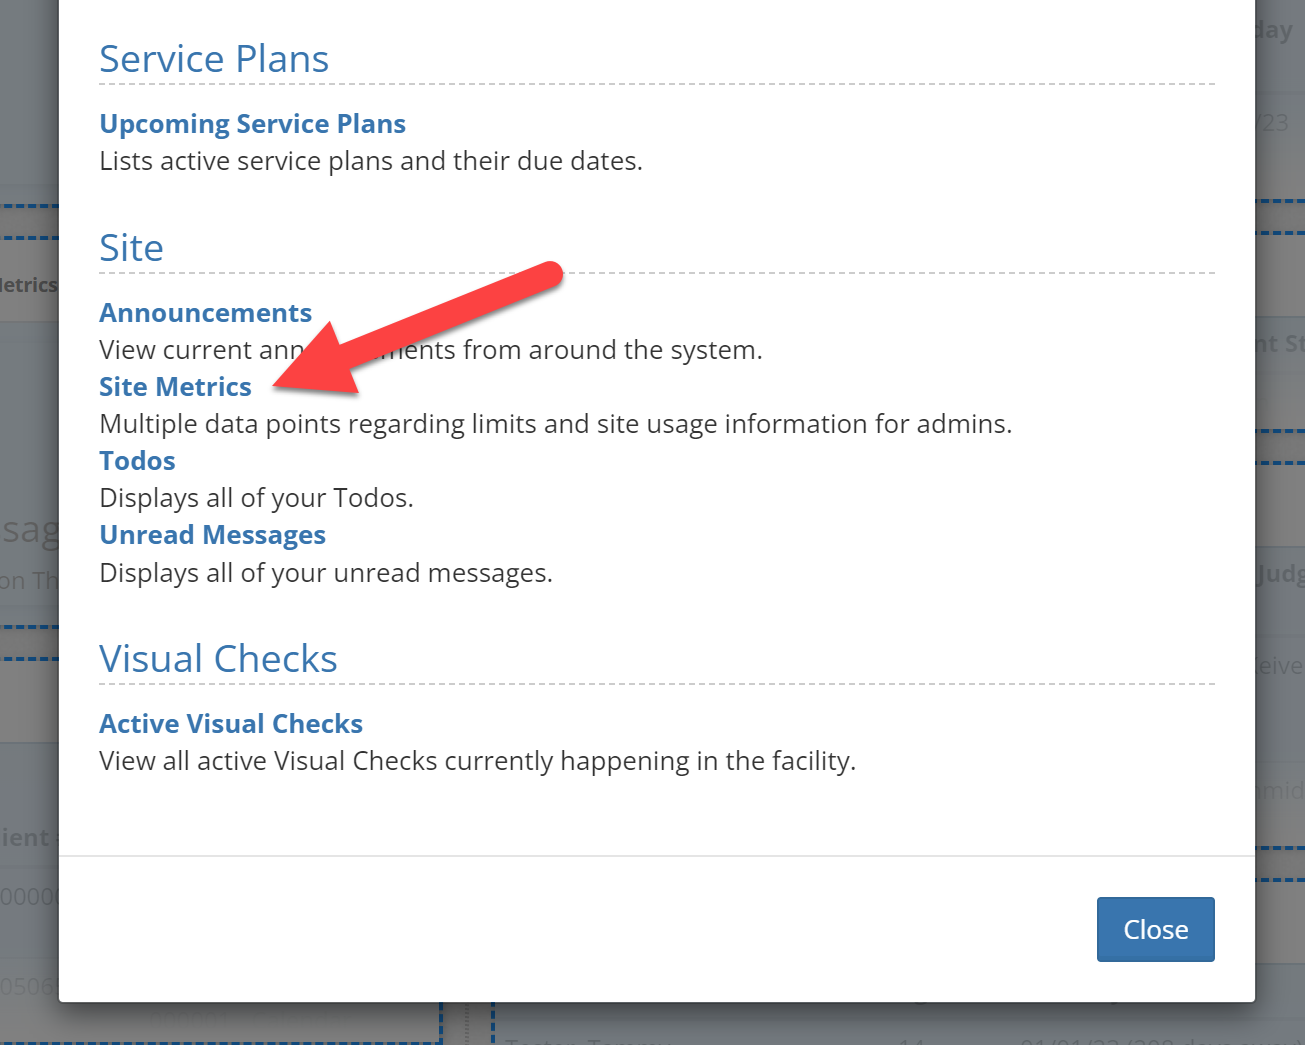
Administrator Dashboard Widget - Site Metrics
To give administrators more insight into the usage of YoutCenter, we’ve added a Site Metrics widget. To add the Site Metrics widget, click the gears on your dashboard and add a widget.
Currently, there are 2 items in the Site Metrics widget, Active Users and SMS Messages. Additional items will be added in the future including Storage Usage.
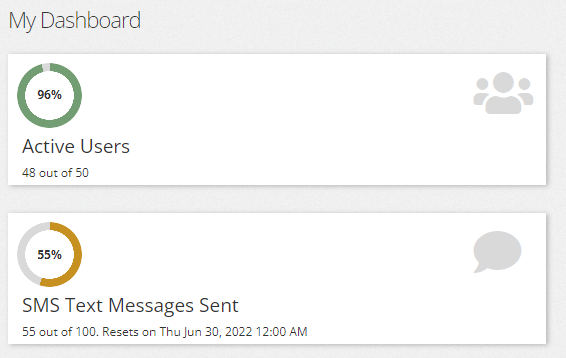
Active Users
The Active Users displays the total number of licensed users your organization has along with how many users you currently have active.
SMS Messages
If your organization has purchased the Text Messaging option for YouthCenter (To remind parents/guardians/youth about calendar appointments), the widget will display the total number of text messages sent in the month, the number of messages included in your plan (don’t worry, the system will continue to send messages if you go over), and when the number will be reset (typically monthly).
We appreciate your feedback
Your continued feedback is important to us, if you run into any issues with this release, please contact
[email protected]. We've also released a new form that you can use to submit ideas for new features. Visit
https://www.youthcenter.net/contact and select feature suggestion from the why are you contacting us dropdown!