
Upcoming Assessment Updates and More

Next week Tuesday, 09/08/2026 YouthCenter will be releasing a significant update to our assessments area.

Splitting Assessments and Screeners

If you work in YouthCenter, you’ve probably noticed that assessments and screeners have always lived together under one “Assessments” menu, even though they serve pretty different purposes day to day. That’s changing. Here’s what’s coming and why.
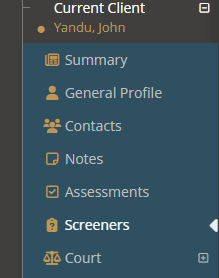
The main menu of YouthCenter that appears on the left side of the site. This is the Case Manager area expanded out to show the example demo client John Yandu. Sub-applications are Summay, General Profile, Contacts, Notes, Assessments, and Court in white text on a dark blue background. The new feature is the sub-application Screeners which is highlighted. All sub-apps are accompanied by their icons in gold.

A new menu item. A dedicated Screeners menu item. Under Case Manager > Current Client, you’ll see “Screeners” show up as its own menu item right alongside “Assessments.” Anyone who currently has access to Assessments will automatically see Screeners too. Behind the scenes, each existing assessment is being tagged as either an Assessment or a Screener so the system knows where it belongs.

Historical Data is moving. Past screener schedules, completed responses, and even in-progress drafts are being migrated into the new Screeners section, so your history is right where you’d expect it.

New places to move your custom assessments and screeners. If you have built custom forms for your custom assessments and screeners you will now be able to move them into the appropriate assessments or screeners area. Just like other custom forms, administrators can choose the area via the form editor.
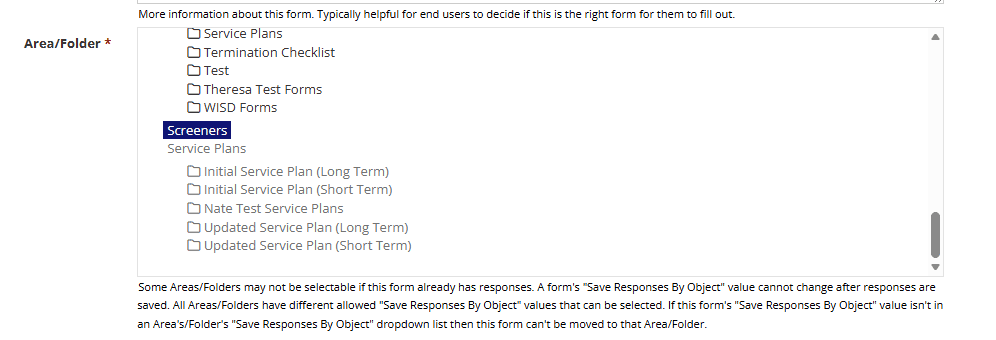
A screenshot of the Settings page within the custom forms Form Builder of YouthCenter. This is the Area/Folder section of the Settings that allows the user to choose where the form is saved. Folders are listed in a file directory with dark grey and black text on a white background. The folder called Screeners is highlighted.

New Data Sources. A long-requested feature: each built-in assessment now has its own column in its own report data source. This should help make comparison via reports much easier.

MJJAS Updates

All of the MJJAS assessments and screeners will now include the interview questions. The interview questions are optional, so if you don’t want to track them in YouthCenter, you can simply answer the scoring questions just like you do today. Additionally, all scoring questions have been updated to the latest verbiage from the University of Cincinnati.

New Tokens Available for Export To Word

Additional tokens for Export to Word have been released.

Charge Reference

The Charge Reference Part will allow you to select one or more charges to be included in your Export to Word. You can choose to have each part be its own line or include them all in one line.
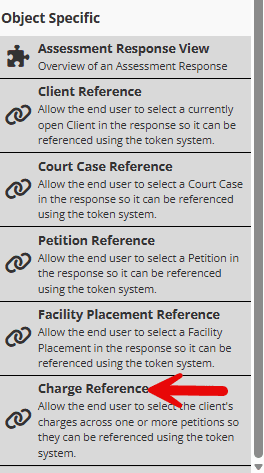
A screenshot of the Build section of the custom forms Form Builder on YouthCenter. The menu lists Object Specific form part widgets that can be added to the form. Listed widgets include Assessment Response View, Client Reference, Court Case Reference, Petition Reference, Facility Placement Reference, and Charge Reference. Subtext for Charge Reference is: Allow the end user to select the client's charges across one or more petitions so they can be referenced using the token system. Text is black on a light grey background and all widgets are accompanied by an icon. There is a red arrow pointing out Charge Reference.

You can find the new part in the Widgets area of the Form Builder. Make sure to give it a part name that’s easy to reference later.
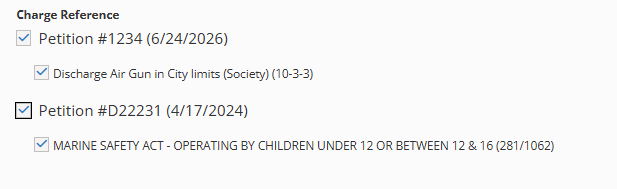
A screenshot of the way this new form part displays in the custom form. The part name Charge Reference is listed as a bold title and two Petitions are listed by number and (date) with the corresponding charges nested underneath. Each Petition and Charge choice has a checkable box. The text is black on a white background.

Once added, you will be able to see all petitions and the offenses. You can select whichever ones you want included in the Export To Word.

You will find the new token categorized under Form. In this example, the part name is MyChargeReferences:
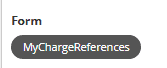
A screenshot of the Token Library area in the custom forms Form Builder. Form is a bold heading of black text on a white background, and MyChargeReferences is in a dark grey pill with white text. The pill under the bold heading indicates that the part name MyChargeReferences is a choose-able token under Form as its source.

Other new tokens

Other new tokens include the client Aliases, Client Contact Addresses, and User List from Group. If you have other tokens that would be helpful to you, please let us know by reaching out to [email protected].

Reports – Export to Excel

You can now choose to export your reports in native Excel formats rather than just CSVs! Simply choose the Export to Excel option on your report.

A screenshot of the Report Results are in YouthCenter. Report headers of white text on dark grey are visible that indicate different Data Sources in the report. There are three buttons on the top right with Export CSV, Export Excel, and Print. Each button is back text on white and the Print button has a small caret indicating further options. A red arrow highlights the Export Excel option.

Print Personal Posessions Summaries

Several detention facilities requested the ability to print the transaction history for personal possessions so they could give a copy to youth upon discharge. We’ve added a print button for ease of use:
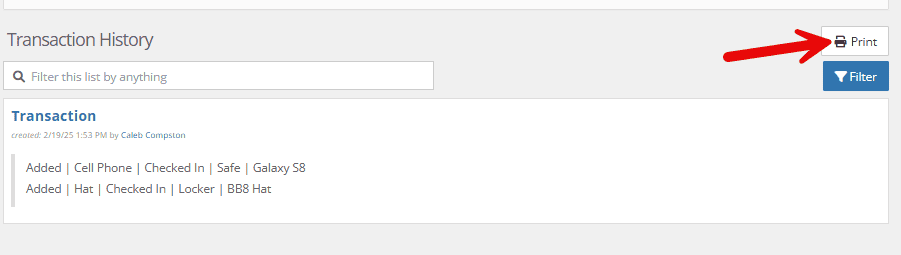
A screenshot of the Personal Possessions area for a client in YouthCenter. This section shows the Transaction History. There is a white search bar with a magnifying glass icon and helper text: Filter this list by anything. Under the search bar, there is an item of history labeled with a blue Transaction heading and a small date and time stamp as subtext, with a summary of items added. on the right, there are two buttons with text and accompanying icons: Print and Filter. The Print button is white with black text, the Filter button is blue with white text. There is a red arrow highlighting the Print button.

Showing data from Custom Forms in their summaries

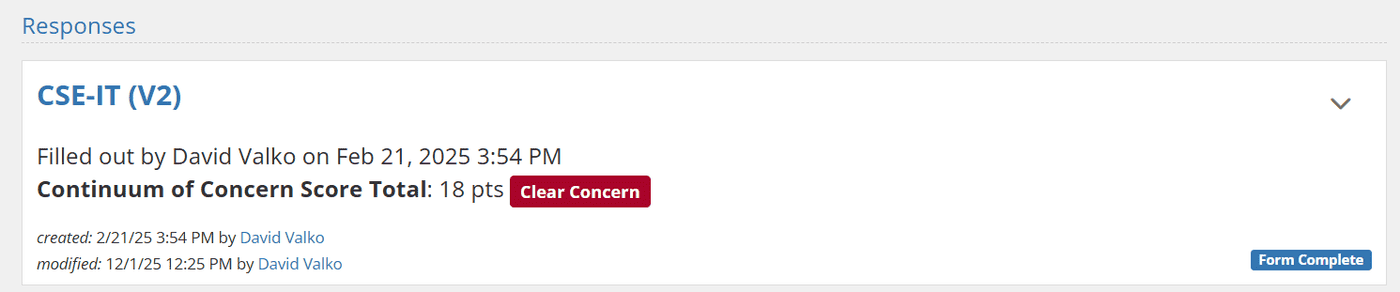
A huge improvement has been added to Custom Forms that allows you to surface important information from your forms on their list page, so users don’t have to click into every form. Simply select the Display in Summary checkbox on a form, and then that field or set of fields will show up in the list view!
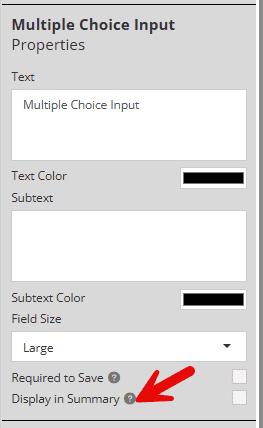
A screenshot of the Build section of the custom forms Form Builder on YouthCenter. A Multiple Choice Input part has been selected, and this is the Properties area of that part. The main background is light grey with black text. There are a few fields (Text, Subtext, Field Size) as well as two checkbox options: Required to Save and Display in Summary. Each of these have a grey ? icon to indicate more details. There is a red arrow pointing out Display in Summary.
A screenshot of what it looks like when the Display in Summary feature is used. This is the Other Forms area of a client in YouthCenter. There's a white box outlining the Response item with its title CSE-IT (V2) in blue. Black text lists when the response was filled out with the respondent's name, date, and time as usual. There's also subtext with created and modified timestamps. The new addition is bold text which stands out from the rest of the text in the item. The text is a form part that has been marked to Display in Summary. This particular part is a Score Total and has an associated point total plus an interpretive score of Clear Concern that is white text in a red pill.

Providing Feedback

Most of these features were implemented in response to your feedback. We read and discuss every suggestion submitted. While we can’t implement every idea, we remain committed to being a product for case managers, built by case managers. Please continue to send us your suggestions via our form here.